> ## Documentation Index
> Fetch the complete documentation index at: https://docs.cognigy.com/llms.txt
> Use this file to discover all available pages before exploring further.
# Getting started with Knowledge AI
This guide walks you through the process of creating an AI Agent that uses Knowledge AI to search information in a knowledge database, extract information, and output answers generated by a large language model (LLM). You'll learn how to [create your first Knowledge Store](#configure-knowledge-store), [upload Knowledge Sources](#upload-knowledge), and [test your AI Agent](#test-your-agent) using the Interaction Panel in the Flow editor.
## Prerequisites
* You have [activated Knowledge AI](/ai/agents/develop/knowledge-ai/activate).
* You have created a [Project](/ai/agents/develop/projects-and-flows/projects) in Cognigy.AI.
* You have added a [Large Language Model (LLM) to your Project](/ai/agents/develop/gen-ai-and-llms/providers/all-providers) that [supports Knowledge Search and Answer Extraction](/ai/agents/develop/gen-ai-and-llms/model-support-by-feature). For more details on how to add a model, read the [Generative AI](/ai/agents/develop/gen-ai-and-llms/generative-ai) documentation.
## Set up Knowledge Store
Set up [Knowledge Store](/ai/agents/develop/knowledge-ai/knowledge-store) involves three steps in the Knowledge AI wizard:
1. **Configure Store** — enter the details of your Knowledge Store.
2. **Upload Knowledge** — upload files to create your first [Knowledge Source](/ai/agents/develop/knowledge-ai/knowledge-source/overview).
3. **Configure Flow** — configure an Answer Extraction model and create a simple Knowledge AI Flow.
In your new Project, select Build > Knowledge to open the Knowledge AI wizard. Then, follow the sections below.
### Configure Knowledge Store
Select your embedding model. You will need the following information to configure the Knowledge Store as follows according to your [LLM Provider](/ai/agents/develop/gen-ai-and-llms/providers/all-providers):
| Information | Details |
| ---------------------------- | --------------------------------------------------------------------------------------------------------------------------------------------------------------------------------------------------------------------------------------------------------------------------------------------------------------------------------------------------------------------------------------------------------------------------------------------------------------------------------------------------------------------------------------------------------------------------------------------------------------------------------------- |
| **Generative AI Connection** | Your LLM connection. |
| **Resource Name** | To find the [resource name](https://learn.microsoft.com/en-us/azure/cognitive-services/openai/how-to/create-resource?pivots=web-portal#create-a-resource) value, go to the **Microsoft Azure** homepage. Under **Azure services**, click **Azure OpenAI**. In the left-side menu, under the **Azure AI Services** section, select **Azure Open AI**. Copy the desired resource name from the **Name** column. |
| **Deployment Name** | To find the [deployment name](https://learn.microsoft.com/en-us/azure/cognitive-services/openai/how-to/create-resource?pivots=web-portal#deploy-a-model), go to the **Microsoft Azure** home page. Under **Azure services**, click **Azure OpenAI**. In the left-side menu, under the **Azure AI Services** section, select **Azure Open AI**. Select a resource from the **Name** column. On the resource page, go to **Resource Management > Model deployments**. On the **Model deployments** page, click **Manage Deployments**. On the **Deployments** page, copy the desired deployment name from the **Deployment name** column. |
| **API Version** | Use the `YYYY-MM-DD` format. Note that the version may have an extended format, for example, `YYYY-MM-DD-preview`. For more details, read [Microsoft Azure documentation](https://learn.microsoft.com/en-us/azure/cognitive-services/openai/reference#rest-api-versioning). |
| **Custom URL** | This parameter is optional. To control the connection between your clusters and the Azure OpenAI provider, you can route connections through dedicated proxy servers, creating an additional layer of security. To do this, enter the URL in the following pattern: `https://.openai.azure.com/openai/deployments//completions?api-version=`. When a Custom URL is added, the **Resource Name**, **Deployment Name**, and **API Version** fields will be ignored. |
| Information | Details |
| ---------------------------- | -------------------- |
| **Generative AI Connection** | Your LLM connection. |
| Information | Details |
| ---------------------------- | -------------------- |
| **Generative AI Connection** | Your LLM connection. |
### Upload Knowledge
For this step, download [this Cognigy text (CTXT) file](https://docscognigyassets.blob.core.windows.net/assets/cognigy-sample.ctxt) about xApps.
To use a [CTXT file](/ai/agents/develop/knowledge-ai/knowledge-source/text-formats/ctxt) as a Knowledge Source, select **Cognigy CTXT** from the **Type** list and upload the downloaded CTXT file.
### Configure Flow
In this step, proceed as follows:
1. Configure an Answer Extraction model in the **Configure Answer Extraction Model** section. The Answer Extraction model generates the AI Agent's answer based on the Knowledge Search results.
2. Create a simple Flow with a Search Extract Output Node for testing Knowledge AI by clicking **Create Flow**. Cognigy.AI creates a Flow named **Knowledge AI** followed by a number.
## Test your Agent
In **Build > Flows**, select the Flow you created in the Knowledge Store Wizard.
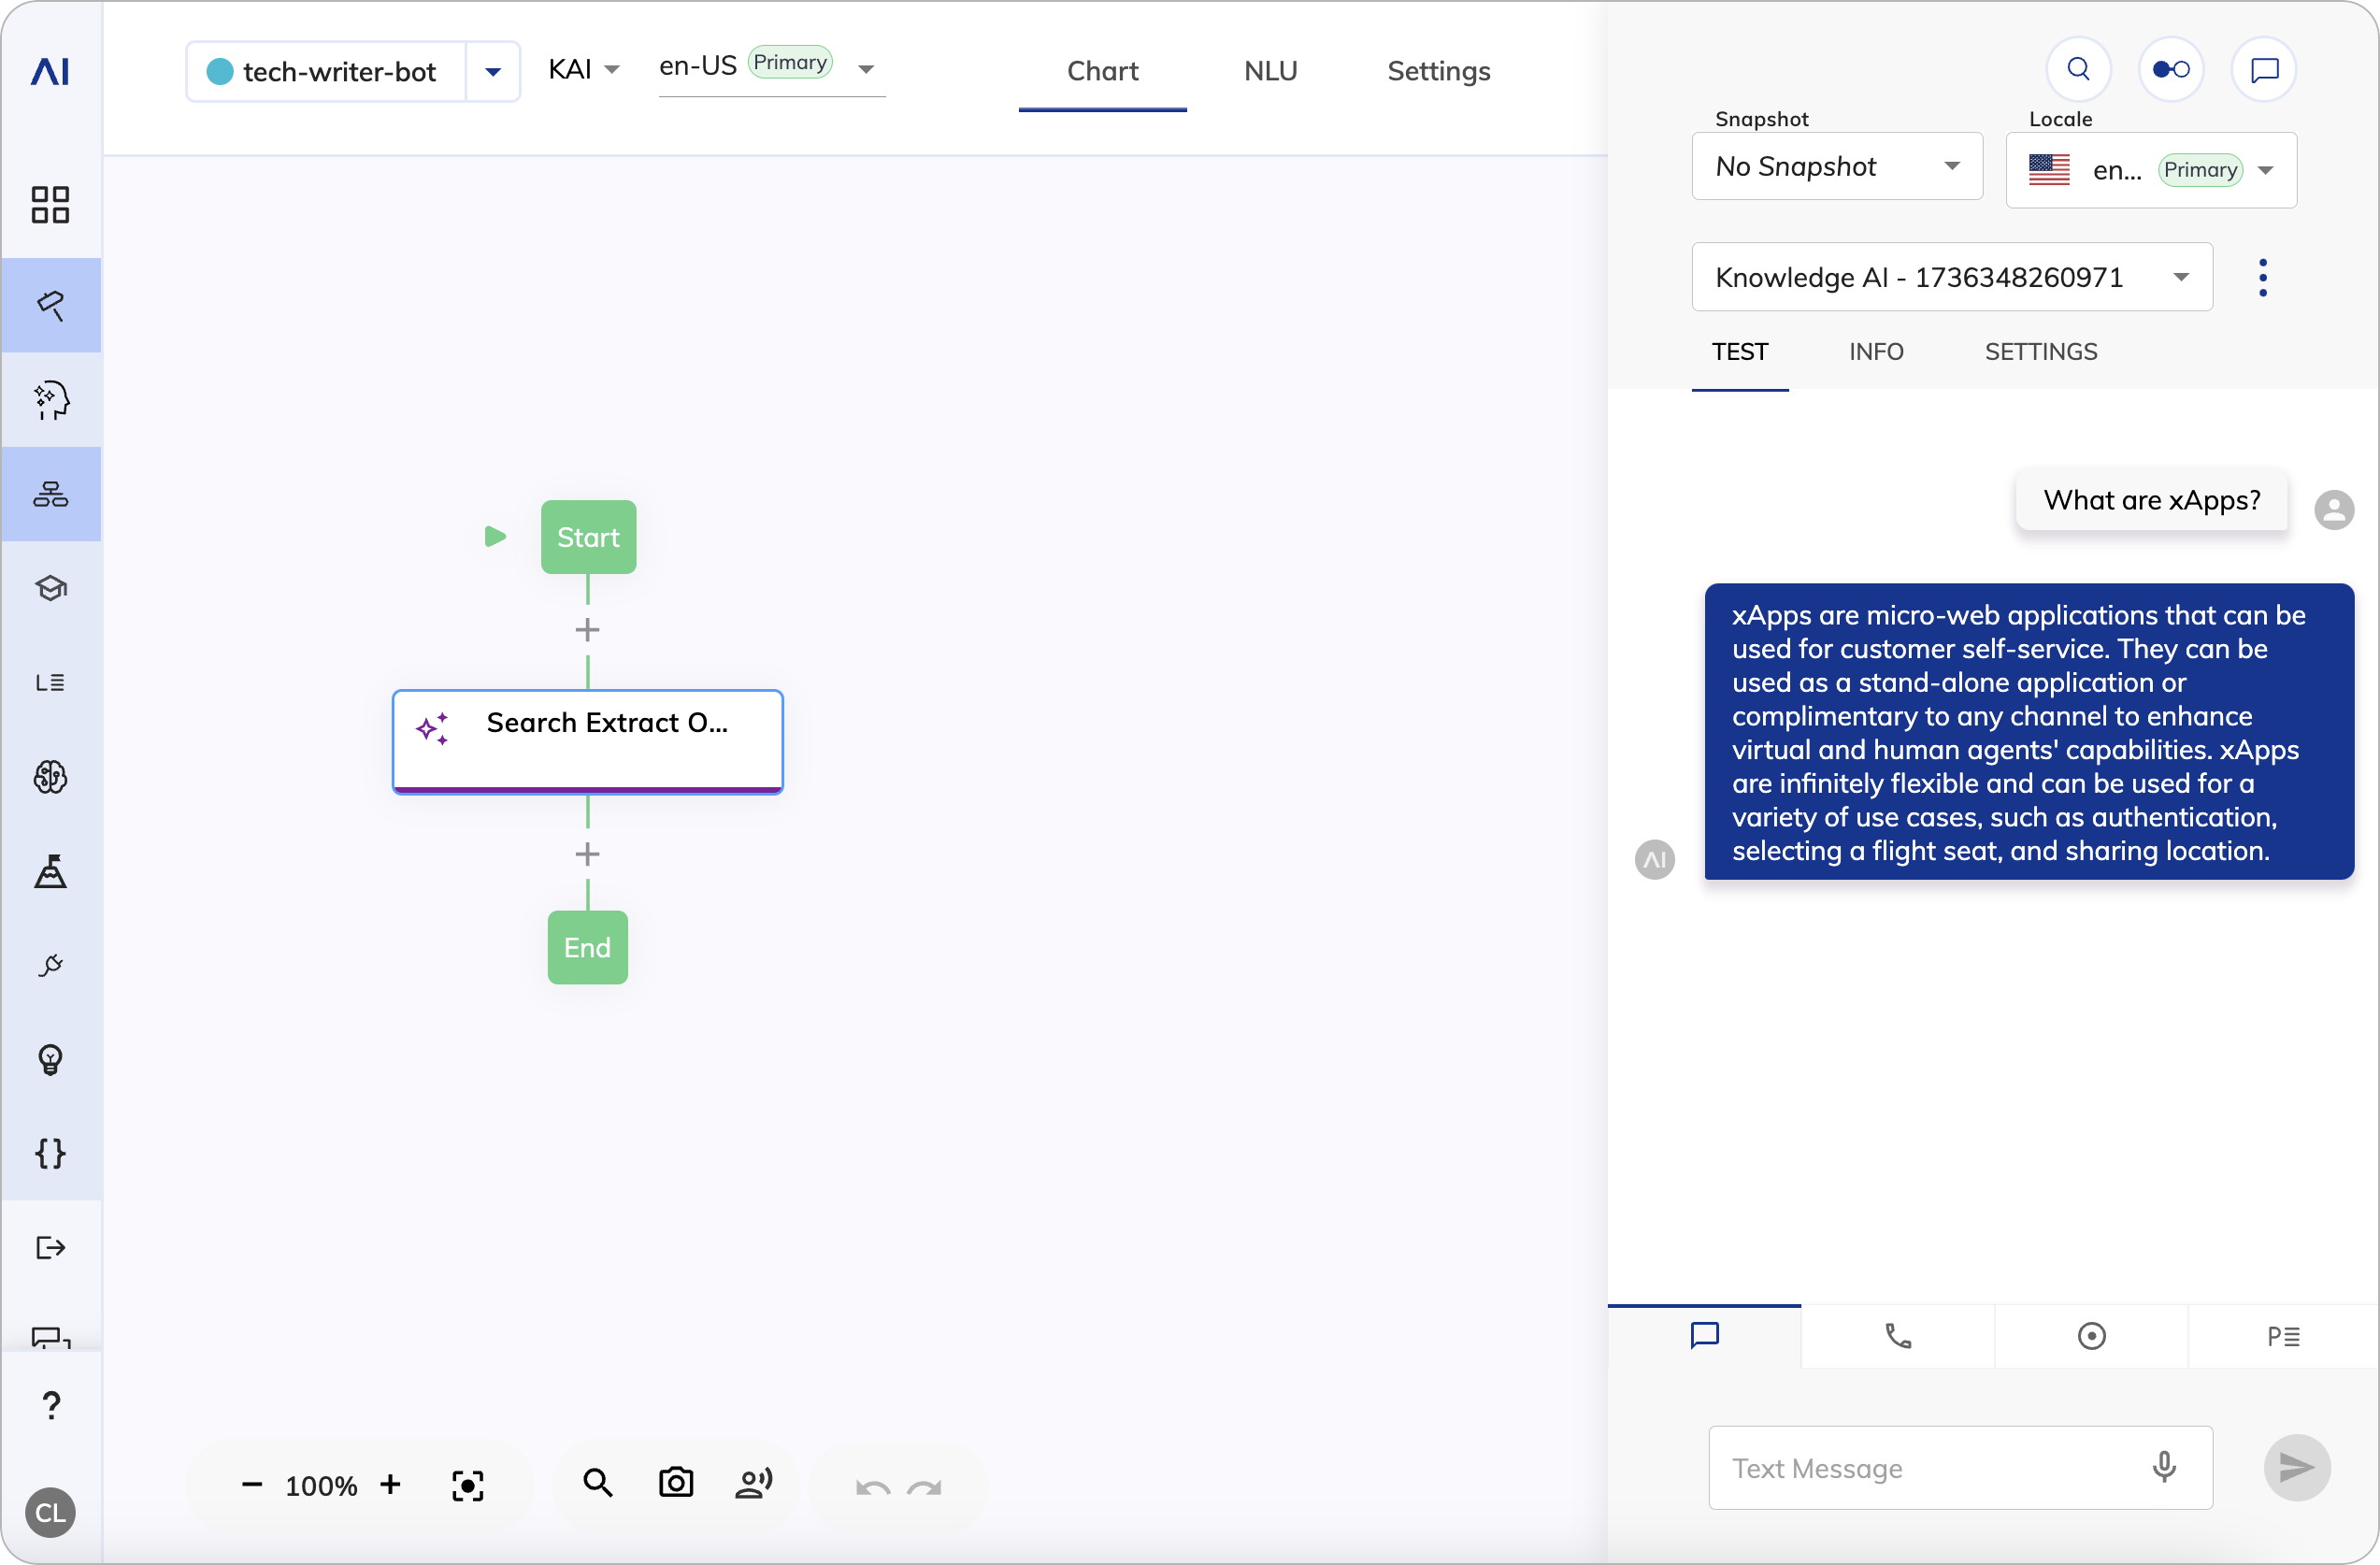 To test Knowledge AI, follow these steps:
1. Open the Interaction Panel by clicking
To test Knowledge AI, follow these steps:
1. Open the Interaction Panel by clicking  in the upper-right corner of the page.
2. Ask the AI Agent `What are xApps?`. The AI Agent will search the Knowledge Store and generate an answer in the chat.
## What's Next?
1. Try creating a [Knowledge Store](/ai/agents/develop/knowledge-ai/knowledge-store) with [Knowledge Sources](/ai/agents/develop/knowledge-ai/knowledge-source/overview) relevant to your business needs.
2. Add Knowledge AI to your Flow with a [Search Extract Output Node](/ai/agents/develop/knowledge-ai/knowledge-search-and-extraction/search-extract-output) and refine the [Node settings](/ai/agents/develop/node-reference/other-nodes/search-extract-output) to cater to your needs.
in the upper-right corner of the page.
2. Ask the AI Agent `What are xApps?`. The AI Agent will search the Knowledge Store and generate an answer in the chat.
## What's Next?
1. Try creating a [Knowledge Store](/ai/agents/develop/knowledge-ai/knowledge-store) with [Knowledge Sources](/ai/agents/develop/knowledge-ai/knowledge-source/overview) relevant to your business needs.
2. Add Knowledge AI to your Flow with a [Search Extract Output Node](/ai/agents/develop/knowledge-ai/knowledge-search-and-extraction/search-extract-output) and refine the [Node settings](/ai/agents/develop/node-reference/other-nodes/search-extract-output) to cater to your needs.