> ## Documentation Index
> Fetch the complete documentation index at: https://docs.cognigy.com/llms.txt
> Use this file to discover all available pages before exploring further.
# Set up a Cognigy.AI Flow for Handover
Live Agent has been put in maintenance mode. The product will continue to be maintained in the foreseeable future. Users can continue to fully rely on Live Agent being available. In future releases, only security updates and bug fixes will be provided; no new features will be released.
Once you've set up your Endpoint for handover to a Live Agent, the next step is configuring your Flow for this purpose within Cognigy.AI.
## Set up Flows for Handover
Once you have [Set up your Endpoint for Handover to Live Agent](/live-agent/getting-started/live-agent-setup/live-agent-setup-handover-endpoint), you can set up your [Flow](/live-agent/getting-started/live-agent-setup/live-agent-setup-handover-flow) for handover to Live Agent.
To create a Live Agent Flow, follow these steps:
1. In the Cognigy.AI interface, open the Project.
2. In the left-side menu of the Project, go to **Build > Flows**.
3. Click **+ New Flow**.
4. Specify a unique name and provide a relevant description. For example, `Customer Support Flow`.
5. Click **Create**.
6. In the Flow editor, add a Say Node.
7. Open the Node editor by clicking the Say Node.
8. In the **Text** field, enter the following text: `Hi, let's hand you over to the humans`.
9. Click **Save Node**.
10. Below the Say Node, add a Handover to Human Agent Node.
11. Open the Node editor by clicking the Handover to Human Agent Node.
12. In the **Handover Accepted Message** field, enter the following text: `Performing the Handover...`
13. In the **Live Agent Settings** section, fill in the following fields:
* **Live Agent Inbox Id** — enter the Inbox ID that you obtained in the [previous step](/live-agent/getting-started/live-agent-setup/live-agent-setup-handover-endpoint).
* **Skills** — enter a list of skills that should be used to filter the available agents. For example, `technical support, billing`.
* **Languages** — enter a list of languages that should be used to filter the available agents. For example, `english, spanish`.
* **Priority** — select a priority for the conversation from the list. For example, `Urgent`.
14. Click **Save Node**.
## Test your Connection
1. Go to the Endpoint that you created in the Cognigy.AI interface.
2. Click **Open Demo Webchat**.
3. Start the conversation by typing `Hi` and clicking the **Send** button.
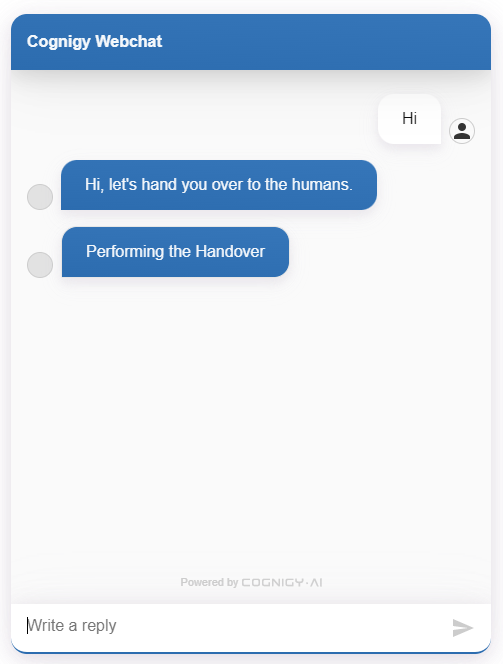 4. In the bottom-left corner of your Project, click **User Menu > Live Agent**.
5. In the left-side menu of the Live Agent interface, select **Conversations**.
On the **All** tab, the conversation that you started should appear in the conversation list.
6. Open the conversation.
7. In the **Reply** section, send a message to the user as a human agent.
4. In the bottom-left corner of your Project, click **User Menu > Live Agent**.
5. In the left-side menu of the Live Agent interface, select **Conversations**.
On the **All** tab, the conversation that you started should appear in the conversation list.
6. Open the conversation.
7. In the **Reply** section, send a message to the user as a human agent.
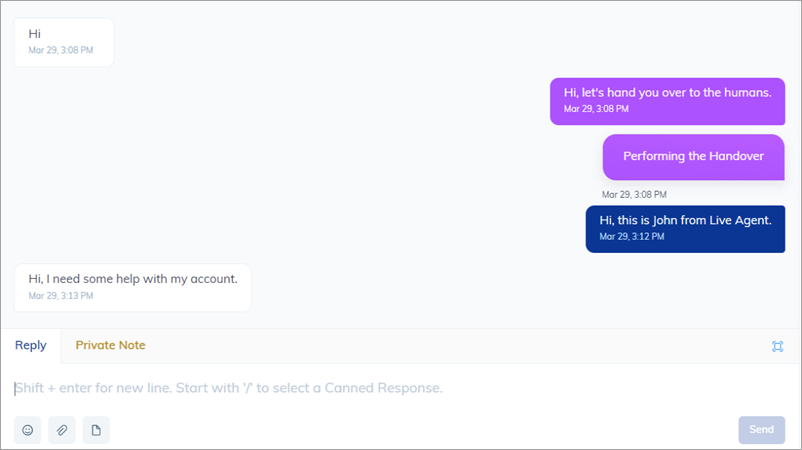 8. This message should also appear in the Cognigy.AI Webchat window.
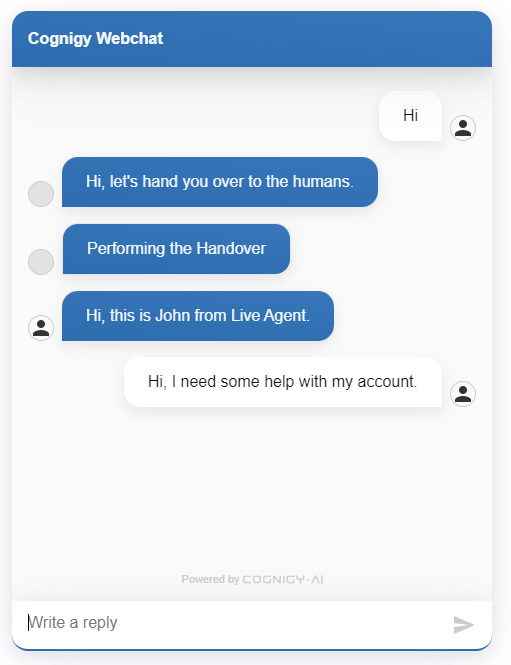 You have successfully completed your first conversation in Live Agent.
## What's Next?
Next, you can [add more users](/live-agent/getting-started/live-agent-setup/live-agent-setup-agents) with `Agent` and `Administrator` roles, and assign them to Inboxes in Live Agent:
You have successfully completed your first conversation in Live Agent.
## What's Next?
Next, you can [add more users](/live-agent/getting-started/live-agent-setup/live-agent-setup-agents) with `Agent` and `Administrator` roles, and assign them to Inboxes in Live Agent: