> ## Documentation Index
> Fetch the complete documentation index at: https://docs.cognigy.com/llms.txt
> Use this file to discover all available pages before exploring further.
# Applications
> Configure Voice Gateway Applications to route Endpoints and set default speech vendor, TTS, and STT language and voice settings for call handling.
Updated in 4.69
*Applications* are connectors
that allow the [Endpoint](/voice-gateway/getting-started#create-a-voice-gateway-endpoint) to be routed to Voice Gateway.
These applications set default values, including the default speech vendor,
language, and voice, for the Text-To-Speech output and Speech-To-Text recognition.
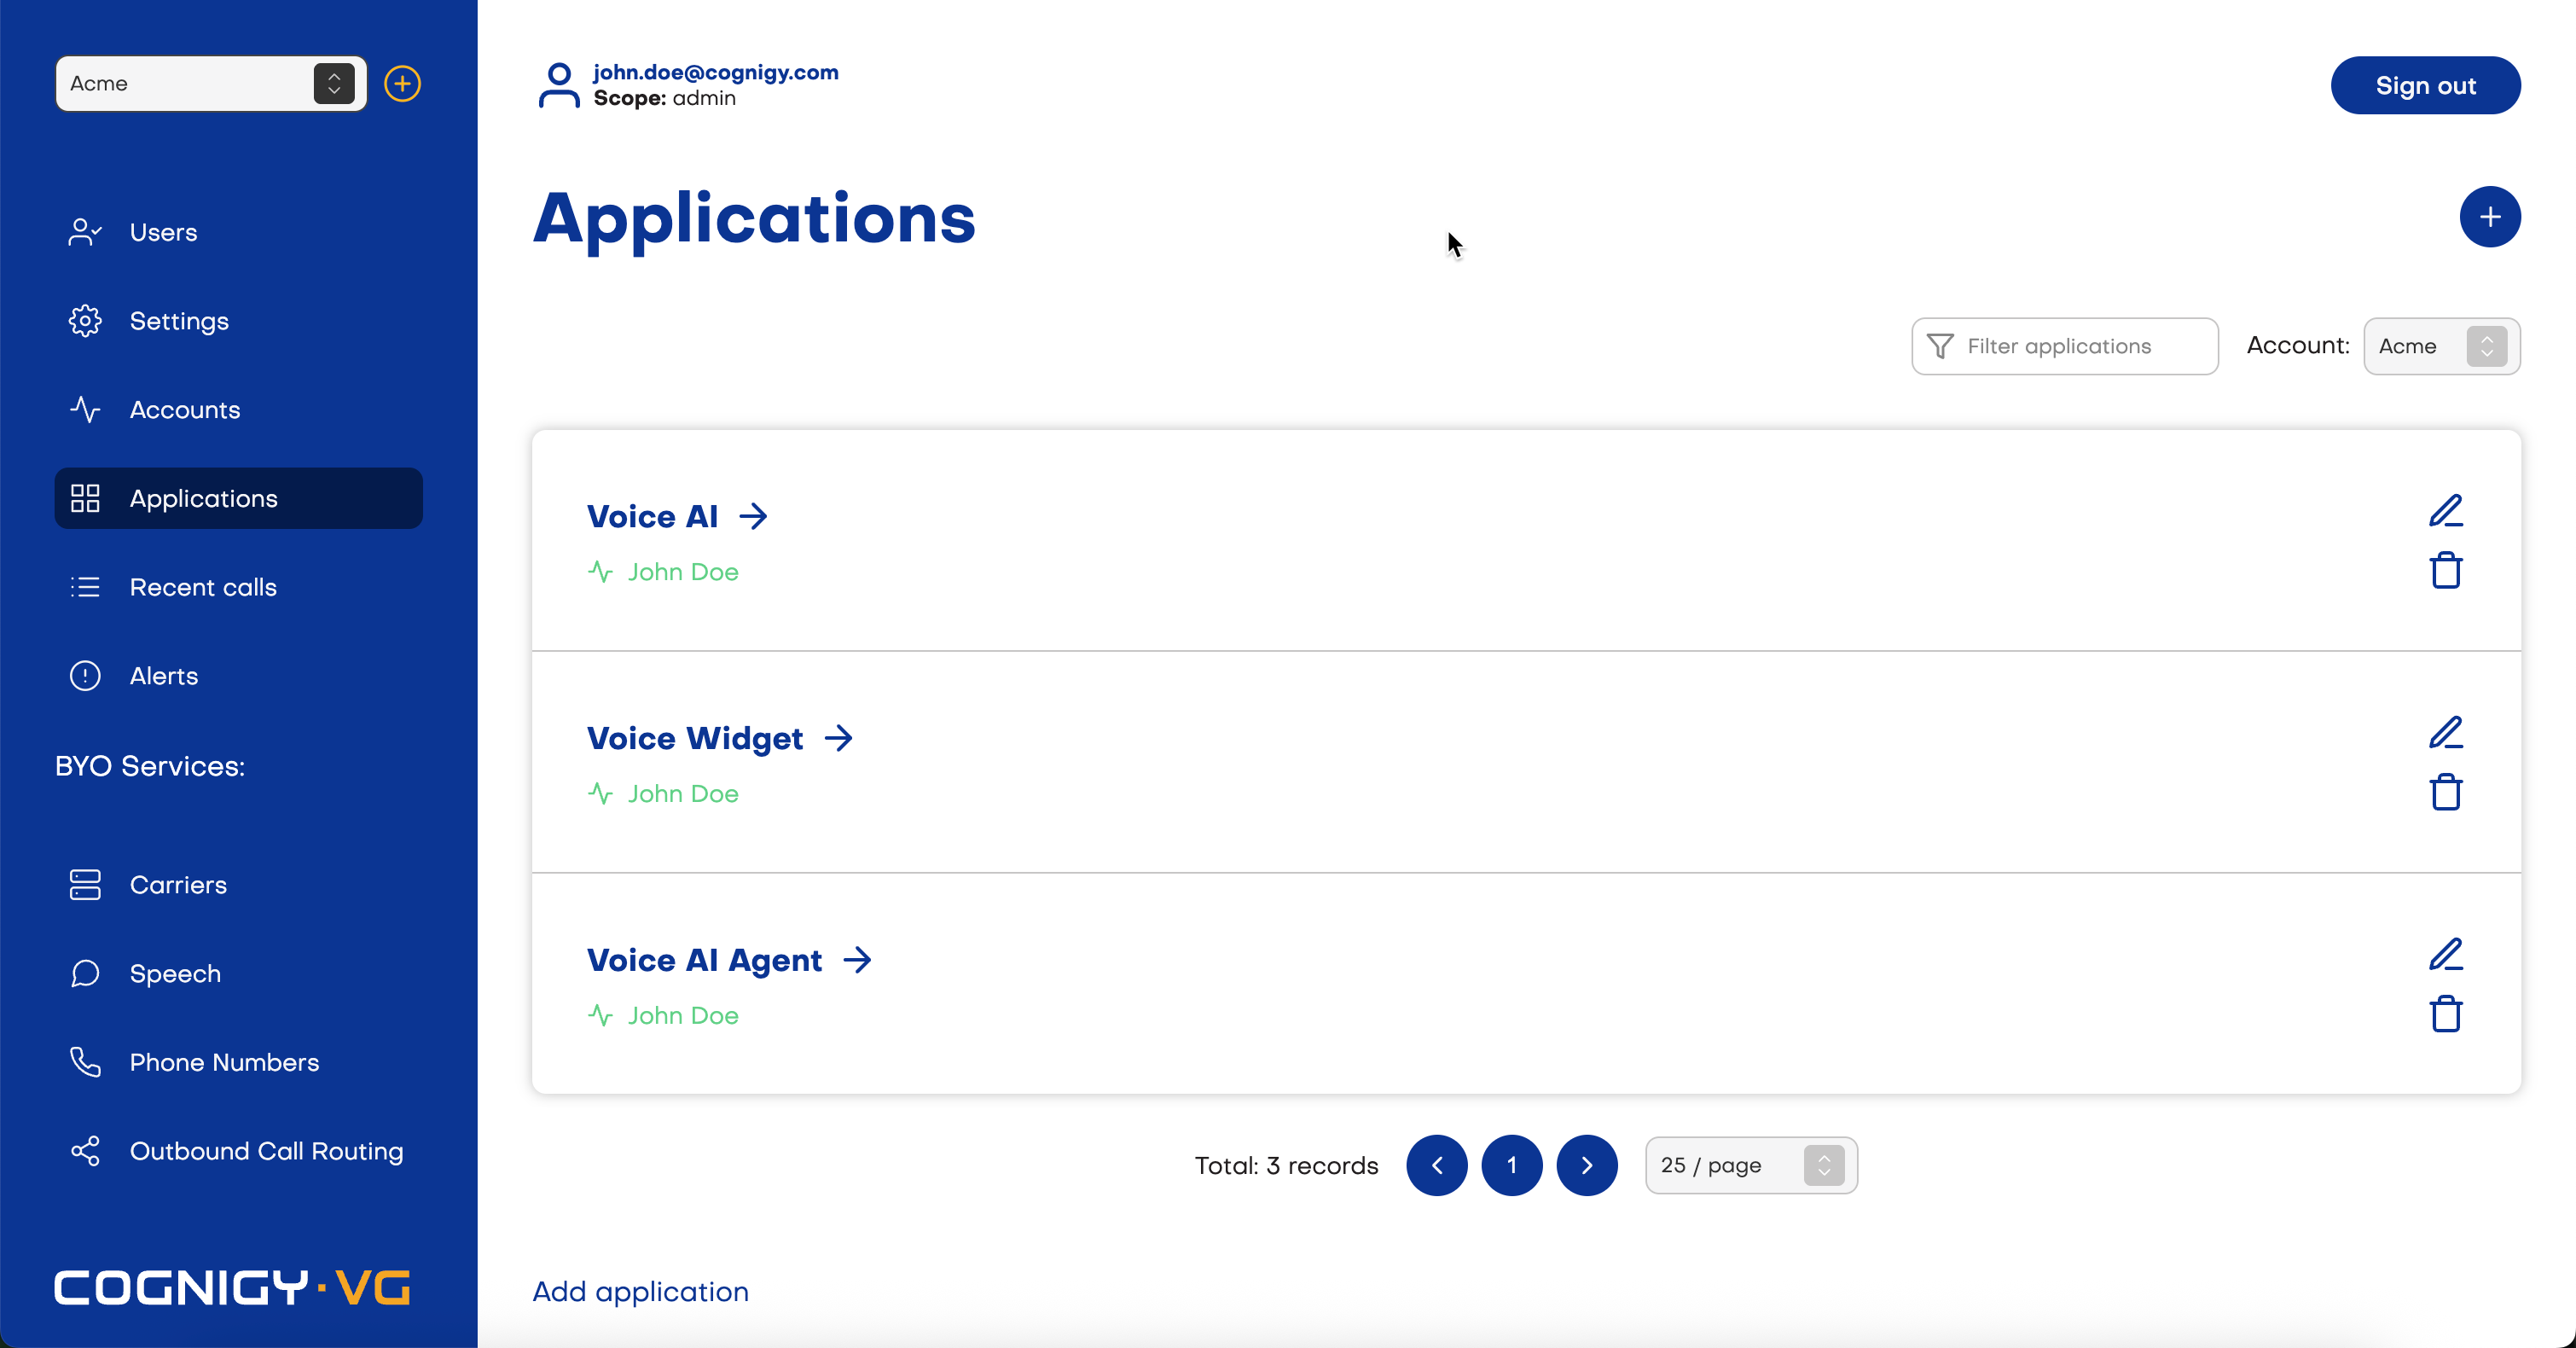
To create an application, select **Applications** in the left-side menu, then click **Add application** or **+**.
You can create more than one application, dependent on the number of Endpoints created in Cognigy.AI.
After creating an application, you can edit or delete it.
 ## Settings
| Settings | Description | Scope |
| ------------------------------------------------------- | ----------------------------------------------------------------------------------------------------------------------------------------------------------------------------------------------------------- | -------------------------------- |
| Application Name | A unique application name. | Account, Service Provider, Admin |
| Account | Select an account from the list. | Account, Service Provider, Admin |
| Calling Webhook | A Cognigy.AI Endpoint URL for the Web Application that will handle calls. Specify your Endpoint URL from the Voice Gateway Endpoint. Select the **POST** request type. | Account, Service Provider, Admin |
| Call Status Webhook | A Cognigy.AI Endpoint URL for the Web Application that will receive the call status. Specify your Endpoint URL from the Voice Gateway Endpoint. Select the **POST** request type. | Account, Service Provider, Admin |
| Speech synthesis vendor | Select a default vendor and set up Language Settings, Voice for Text-To-Speech output. If you have another vendor with the same credentials, specify the alternative name of the vendor in the Label field. | Account, Service Provider, Admin |
| Speech recognizer vendor | Select a default vendor and set up Language Settings for Speech-To-Text recognition. If you have another vendor with the same credentials, specify the alternative name of the vendor in the Label field. | Account, Service Provider, Admin |
| Use a fallback speech vendor if primary fails | Add an [additional Speech-To-Text or Text-To-Speech](#add-additional-tts-and-stt-vendor) vendor. | Account, Service Provider, Admin |
| Perform a fallback transfer if webhook connection fails | [Redirect a call](#call-forwarding) if the connection to Cognigy.AI is unavailable for any reason. | Account, Service Provider, Admin |
## Add Additional TTS and STT Vendor
To add extra vendor, follow these steps:
1. In the left-side menu of the Voice Gateway Self-Service Portal, select **Applications**.
2. Create a new application or use an existing one.
3. On the application page, activate the **Use a fallback speech vendor if primary fails** setting.
4. Choose the vendor type you want to add (STT or TTS) or add both at once:
* TTS:
* **Speech synthesis vendor** — select a TTS vendor from the list.
* **Label** — specify the alternative name of the vendor in the Label field if you have the default vendor with the same credentials.
* **Language** — select a primary language.
* **Voice** — select a primary voice for the AI Agent.
* STT:
* **Speech recognizer vendor** — select an STT vendor from the list.
* **Label** — specify the alternative name of the vendor in the Label field if you have the default vendor with the same credentials.
* **Language** — select a primary language.
5. *(Optional)* Click **Swap primary and fallback**. The primary and fallback credentials will change places.
6. Click **Save**.
The changes take effect.
## Call recording configuration
Call recordings can be enabled at an account or application level for debugging purposes.
To enable this feature and store your calls, you must provide credentials for a bucket vendor. After a call is recorded,
an admin can listen to and review recordings on the [Recent calls](/voice-gateway/webapp/recent-calls#call-recordings) page.
Note that this feature records the entire call, and you cannot manage it within a Cognigy.AI Flow.
If you want to control call recording in your Flow, use a [Call Recording](/ai/agents/develop/node-reference/voice/voice-gateway/call-recording) Node.
This Node enables you to store and record calls; you can start, stop, and pause recordings at any point.
After a call is recorded,
an admin can listen to and review recordings on the [Recent calls](/voice-gateway/webapp/recent-calls#call-recordings) page.
### Application level recording
When enabled at the application level, only calls from a specific application will be recorded.
To enable recording calls at an application level, follow these steps:
1. In the left-side menu of the Voice Gateway Self-Service Portal, select **Applications**.
2. Create a new application or use an existing one.
3. In the **Call recording configuration** section, click the option for **Enable call recording**.
4. In the **Audio Format** field, choose between `.wav` and `.mp3` formats.
5. Select a bucket vendor:
* **Bucket Name** — provide the name of your bucket.
* **Region** — choose the region for your storage from the list.
* **Access key ID** — provide the access key ID for your bucket.
* **Secret access key** — provide the secret access key ID for your bucket.
* **S3 Tags** — provide any S3 tags with name and value as needed.
* **Bucket Name** — provide the name of your bucket.
* **Service key** — provide a JSON key for a Service Account with APIs enabled for Cloud Storage and Storage Transfer API.
* **Google Cloud Storage Tags** — provide any Google Cloud Storage tags with name and value as needed.
* **Container Name** — provide the name of your container.
* **Connection String** — provide a [connection string](https://learn.microsoft.com/en-us/azure/storage/common/storage-configure-connection-string).
* **Azure Cloud Storage Tags** — provide any Azure Cloud Storage tags with name and value as needed.
6. Click **Test** to verify your connection.
7. Go to **Applications** and select the Account from the dropdown box on the right side of the screen.
8. Click the application to edit.
9. Scroll down to the **Call recording configuration** section, activate the **Record all calls** setting. This setting is hidden if you've enabled **Record all calls for this account** at the [account level](/voice-gateway/webapp/accounts).
10. Click **Save**.
All calls from this application will be recorded and appear in the [Recent calls](/voice-gateway/webapp/recent-calls#call-recordings) page.
## Call Forwarding
If Voice Gateway fails to establish a connection with Cognigy.AI at the start of a call, you can forward the call to another number. For example, if an AI Agent is unavailable, the call is redirected, for example, to a contact center, where a human agent could help the customer. If the call forwarded to the contact center fails, Voice Gateway terminates the connection.
To configure call forwarding, follow these steps:
1. In the left-side menu of the Voice Gateway Self-Service Portal, select **Applications**.
2. Create a new application or use an existing one.
3. On the **Edit application** page, activate the **Perform a fallback transfer if webhook connection fails** setting.
4. Select your preferred method for call redirection:
1) From the **Transfer type** list, select **Refer**.
## Settings
| Settings | Description | Scope |
| ------------------------------------------------------- | ----------------------------------------------------------------------------------------------------------------------------------------------------------------------------------------------------------- | -------------------------------- |
| Application Name | A unique application name. | Account, Service Provider, Admin |
| Account | Select an account from the list. | Account, Service Provider, Admin |
| Calling Webhook | A Cognigy.AI Endpoint URL for the Web Application that will handle calls. Specify your Endpoint URL from the Voice Gateway Endpoint. Select the **POST** request type. | Account, Service Provider, Admin |
| Call Status Webhook | A Cognigy.AI Endpoint URL for the Web Application that will receive the call status. Specify your Endpoint URL from the Voice Gateway Endpoint. Select the **POST** request type. | Account, Service Provider, Admin |
| Speech synthesis vendor | Select a default vendor and set up Language Settings, Voice for Text-To-Speech output. If you have another vendor with the same credentials, specify the alternative name of the vendor in the Label field. | Account, Service Provider, Admin |
| Speech recognizer vendor | Select a default vendor and set up Language Settings for Speech-To-Text recognition. If you have another vendor with the same credentials, specify the alternative name of the vendor in the Label field. | Account, Service Provider, Admin |
| Use a fallback speech vendor if primary fails | Add an [additional Speech-To-Text or Text-To-Speech](#add-additional-tts-and-stt-vendor) vendor. | Account, Service Provider, Admin |
| Perform a fallback transfer if webhook connection fails | [Redirect a call](#call-forwarding) if the connection to Cognigy.AI is unavailable for any reason. | Account, Service Provider, Admin |
## Add Additional TTS and STT Vendor
To add extra vendor, follow these steps:
1. In the left-side menu of the Voice Gateway Self-Service Portal, select **Applications**.
2. Create a new application or use an existing one.
3. On the application page, activate the **Use a fallback speech vendor if primary fails** setting.
4. Choose the vendor type you want to add (STT or TTS) or add both at once:
* TTS:
* **Speech synthesis vendor** — select a TTS vendor from the list.
* **Label** — specify the alternative name of the vendor in the Label field if you have the default vendor with the same credentials.
* **Language** — select a primary language.
* **Voice** — select a primary voice for the AI Agent.
* STT:
* **Speech recognizer vendor** — select an STT vendor from the list.
* **Label** — specify the alternative name of the vendor in the Label field if you have the default vendor with the same credentials.
* **Language** — select a primary language.
5. *(Optional)* Click **Swap primary and fallback**. The primary and fallback credentials will change places.
6. Click **Save**.
The changes take effect.
## Call recording configuration
Call recordings can be enabled at an account or application level for debugging purposes.
To enable this feature and store your calls, you must provide credentials for a bucket vendor. After a call is recorded,
an admin can listen to and review recordings on the [Recent calls](/voice-gateway/webapp/recent-calls#call-recordings) page.
Note that this feature records the entire call, and you cannot manage it within a Cognigy.AI Flow.
If you want to control call recording in your Flow, use a [Call Recording](/ai/agents/develop/node-reference/voice/voice-gateway/call-recording) Node.
This Node enables you to store and record calls; you can start, stop, and pause recordings at any point.
After a call is recorded,
an admin can listen to and review recordings on the [Recent calls](/voice-gateway/webapp/recent-calls#call-recordings) page.
### Application level recording
When enabled at the application level, only calls from a specific application will be recorded.
To enable recording calls at an application level, follow these steps:
1. In the left-side menu of the Voice Gateway Self-Service Portal, select **Applications**.
2. Create a new application or use an existing one.
3. In the **Call recording configuration** section, click the option for **Enable call recording**.
4. In the **Audio Format** field, choose between `.wav` and `.mp3` formats.
5. Select a bucket vendor:
* **Bucket Name** — provide the name of your bucket.
* **Region** — choose the region for your storage from the list.
* **Access key ID** — provide the access key ID for your bucket.
* **Secret access key** — provide the secret access key ID for your bucket.
* **S3 Tags** — provide any S3 tags with name and value as needed.
* **Bucket Name** — provide the name of your bucket.
* **Service key** — provide a JSON key for a Service Account with APIs enabled for Cloud Storage and Storage Transfer API.
* **Google Cloud Storage Tags** — provide any Google Cloud Storage tags with name and value as needed.
* **Container Name** — provide the name of your container.
* **Connection String** — provide a [connection string](https://learn.microsoft.com/en-us/azure/storage/common/storage-configure-connection-string).
* **Azure Cloud Storage Tags** — provide any Azure Cloud Storage tags with name and value as needed.
6. Click **Test** to verify your connection.
7. Go to **Applications** and select the Account from the dropdown box on the right side of the screen.
8. Click the application to edit.
9. Scroll down to the **Call recording configuration** section, activate the **Record all calls** setting. This setting is hidden if you've enabled **Record all calls for this account** at the [account level](/voice-gateway/webapp/accounts).
10. Click **Save**.
All calls from this application will be recorded and appear in the [Recent calls](/voice-gateway/webapp/recent-calls#call-recordings) page.
## Call Forwarding
If Voice Gateway fails to establish a connection with Cognigy.AI at the start of a call, you can forward the call to another number. For example, if an AI Agent is unavailable, the call is redirected, for example, to a contact center, where a human agent could help the customer. If the call forwarded to the contact center fails, Voice Gateway terminates the connection.
To configure call forwarding, follow these steps:
1. In the left-side menu of the Voice Gateway Self-Service Portal, select **Applications**.
2. Create a new application or use an existing one.
3. On the **Edit application** page, activate the **Perform a fallback transfer if webhook connection fails** setting.
4. Select your preferred method for call redirection:
1) From the **Transfer type** list, select **Refer**.
2) *(Optional)* In the **Reason** field, specify the reason for transferring a call, for example, `Cognigy.AI connection wasn't established`. The value will be transmitted in the `"X-Reason": ""` format within a custom SIP header and will be present in the pcap file on the recipient's side for further analysis.
3) In the **Target** field, specify the telephone number to which the call will be redirected. The number must be in the international format (E.164), starting with a `+` sign.
4) *(Optional)* In the **Referred-by** field, change the original Referred By value, which can be a SIP URI or a user identifier such as a phone number. This field helps to filter out unwanted incoming calls. You can use the following patterns:
- **SIP URI** - `sip:[referred-by]@custom.domain.com`. In this case, the entire SIP URI will be sent as the Referred-By header. Example: `"Referred-by": "sip:CognigyOutbound@custom.domain.com"`.
- **User Identifier** - `sip:[referred-by]@[SIP FROM Domain from carrier config]`. Example: `"Referred-By": "sip:CognigyOutbound@sip.cognigy.ai"`.
1. From the **Transfer type** list, select **Dial**.
2. *(Optional)* In the **Reason** field, specify the reason for transferring a call, for example, `Cognigy.AI connection wasn't established`. The value will be transmitted in the `"X-Reason": ""` format within a custom SIP header and will be present in the `.pcap` file on the recipient's side for further analysis.
3. In the **Target** field, specify the telephone number to which the call will be redirected. The number must be in the international format (E.164), starting with a `+` sign.
4. *(Optional)* In the **Caller ID** field, specify the caller ID. Note that some carriers, such as Twilio, may require a registered number for outgoing calls.
5. Click **Save**.