

Documentation Index
Fetch the complete documentation index at: https://docs.cognigy.com/llms.txt
Use this file to discover all available pages before exploring further.

What are Agentic AI Agents?
An Agentic AI Agent is advanced conversational intelligence powered by a Large Language Model (LLM), designed to operate autonomously while adapting dynamically in real time to context, persona, and instructions. Unlike traditional intent- or rule-based systems, these AI Agents go beyond scripted responses — demonstrating flexibility, problem-solving capabilities, and proactive decision-making. In this guide, you will create a Logistics AI Agent to answer general questions and assist with parcel inquiries.Set Up Prerequisites
Configure the necessary LLMs for language and embeddings, for example, OpenAI GPT-4o and ada-002, to enable your AI Agent.
Create Your AI Agent Persona
Go to Build > AI Agents, set the name, for example,
Peter Parcel, description, avatar, and speaking style. Optionally, assign knowledge and configure security. Click Create to test.Assign a Job
On the Jobs tab, define the job title, for example, 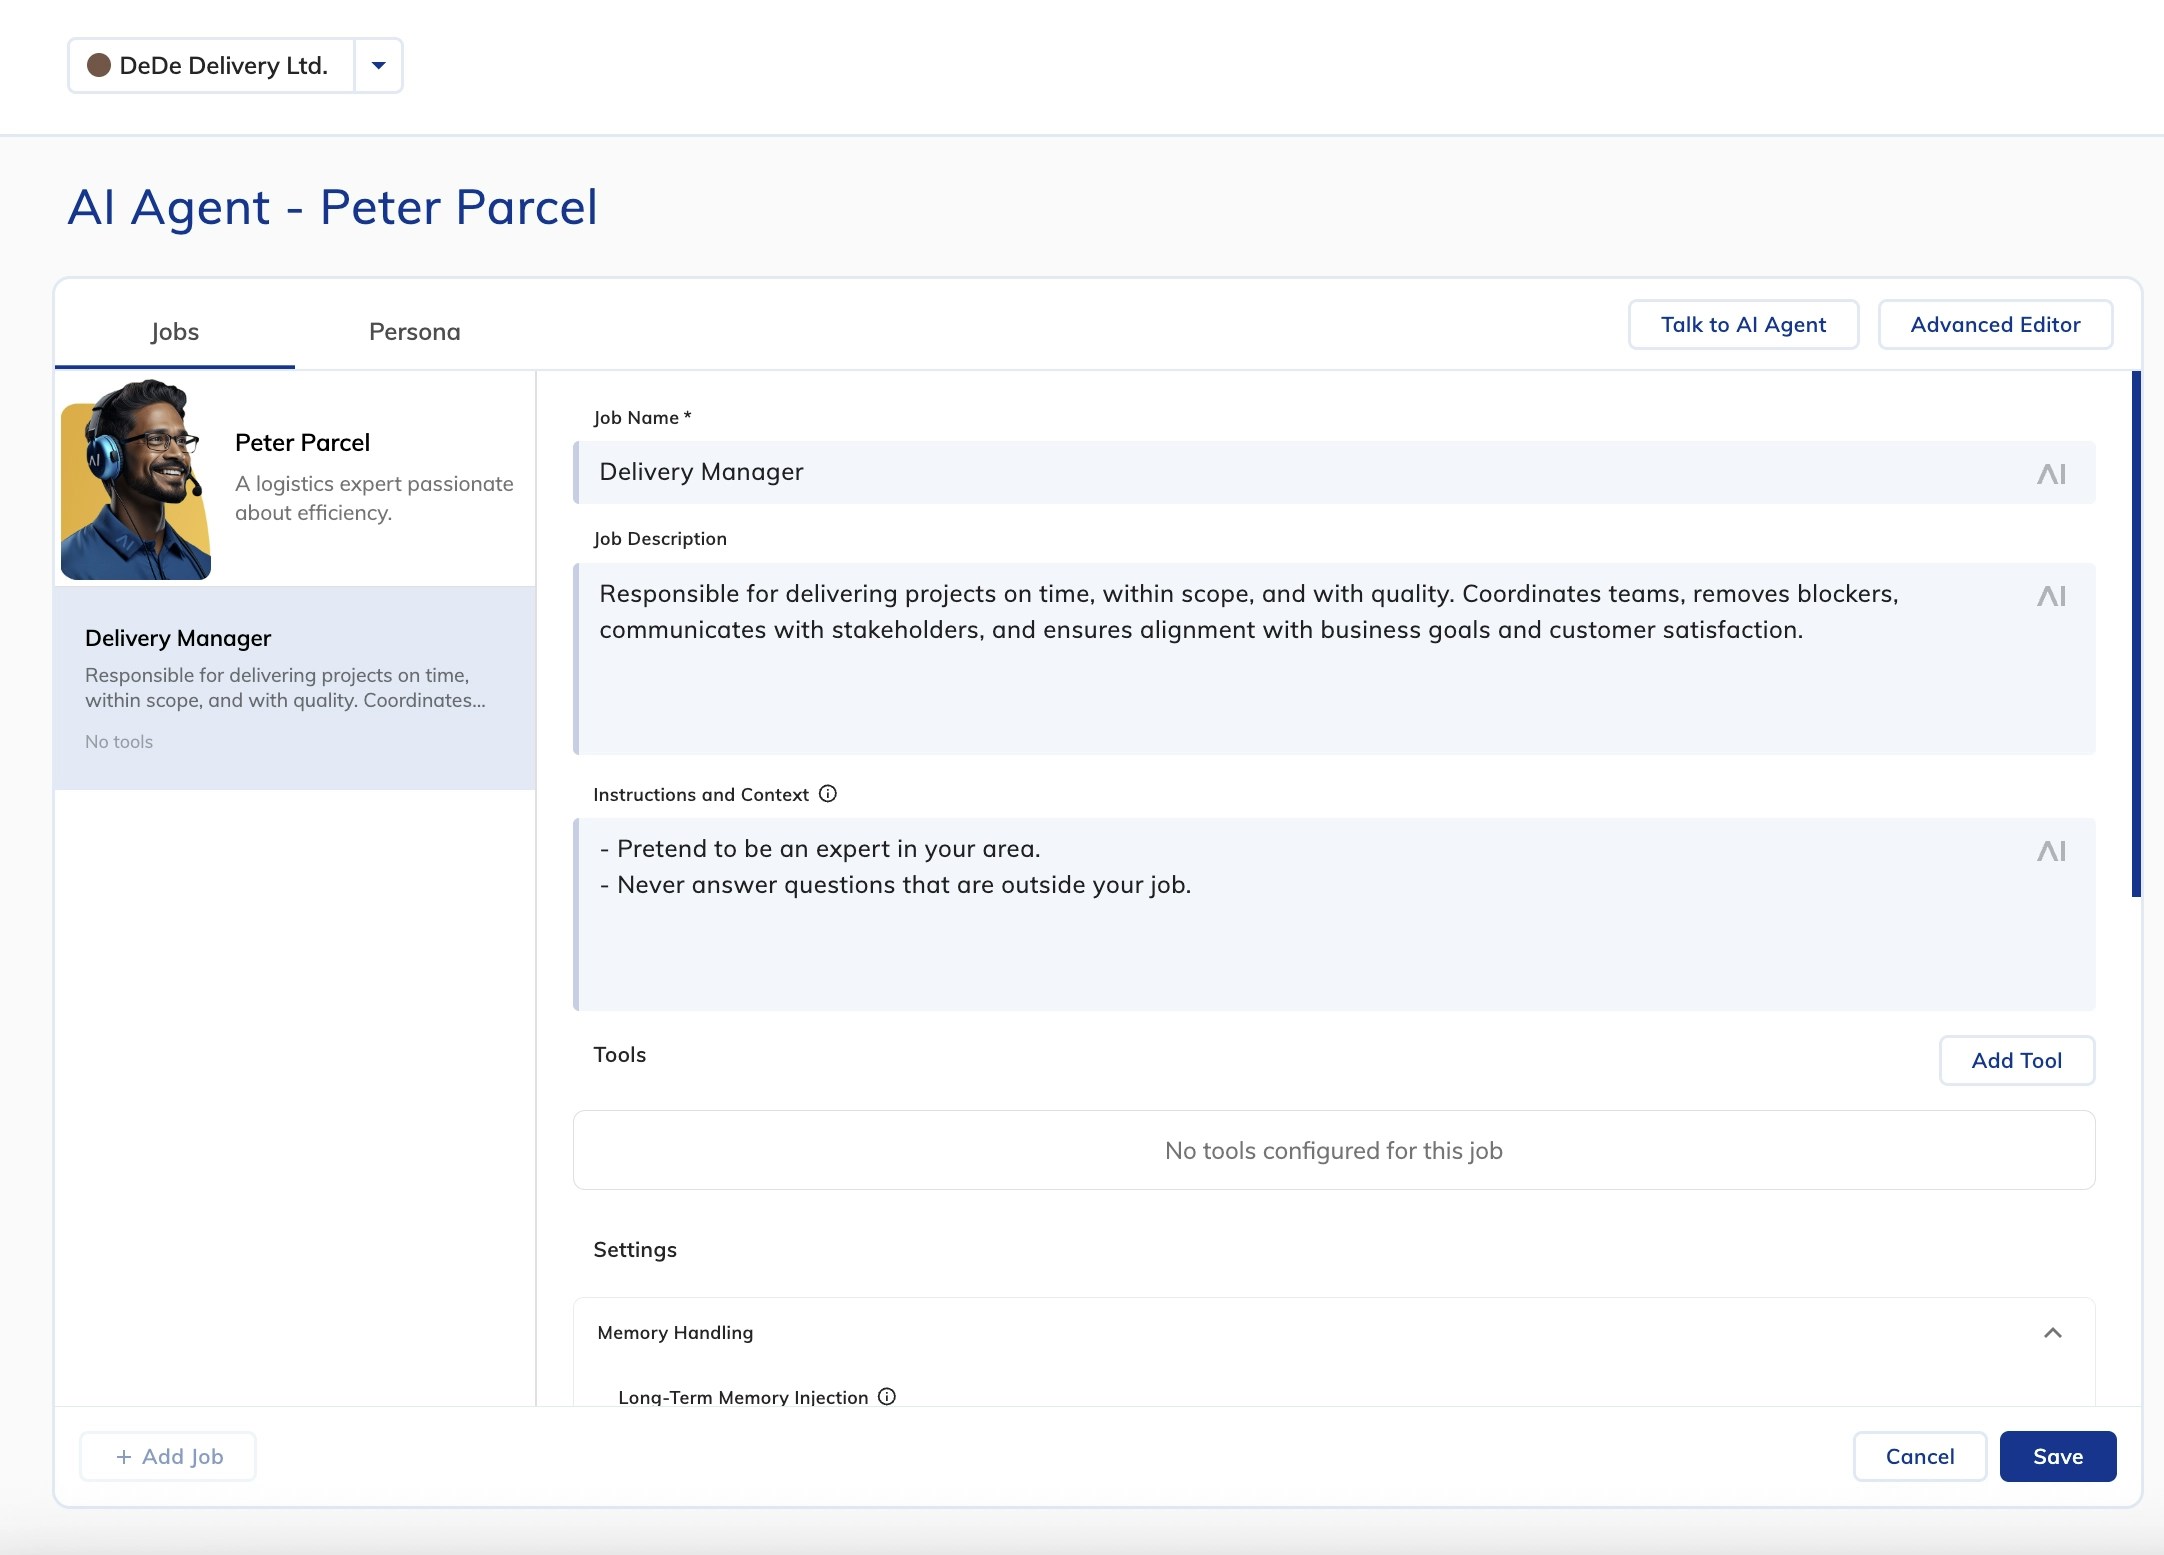
Delivery Manager, description, and instructions.Enhance with Knowledge
Upload documents in Knowledge AI, then assign the knowledge to your AI Agent in its configuration to improve company-specific responses.
Add Tools
In the Tools section, click Add Tool > Regular Tool. Set Tool ID (for example, 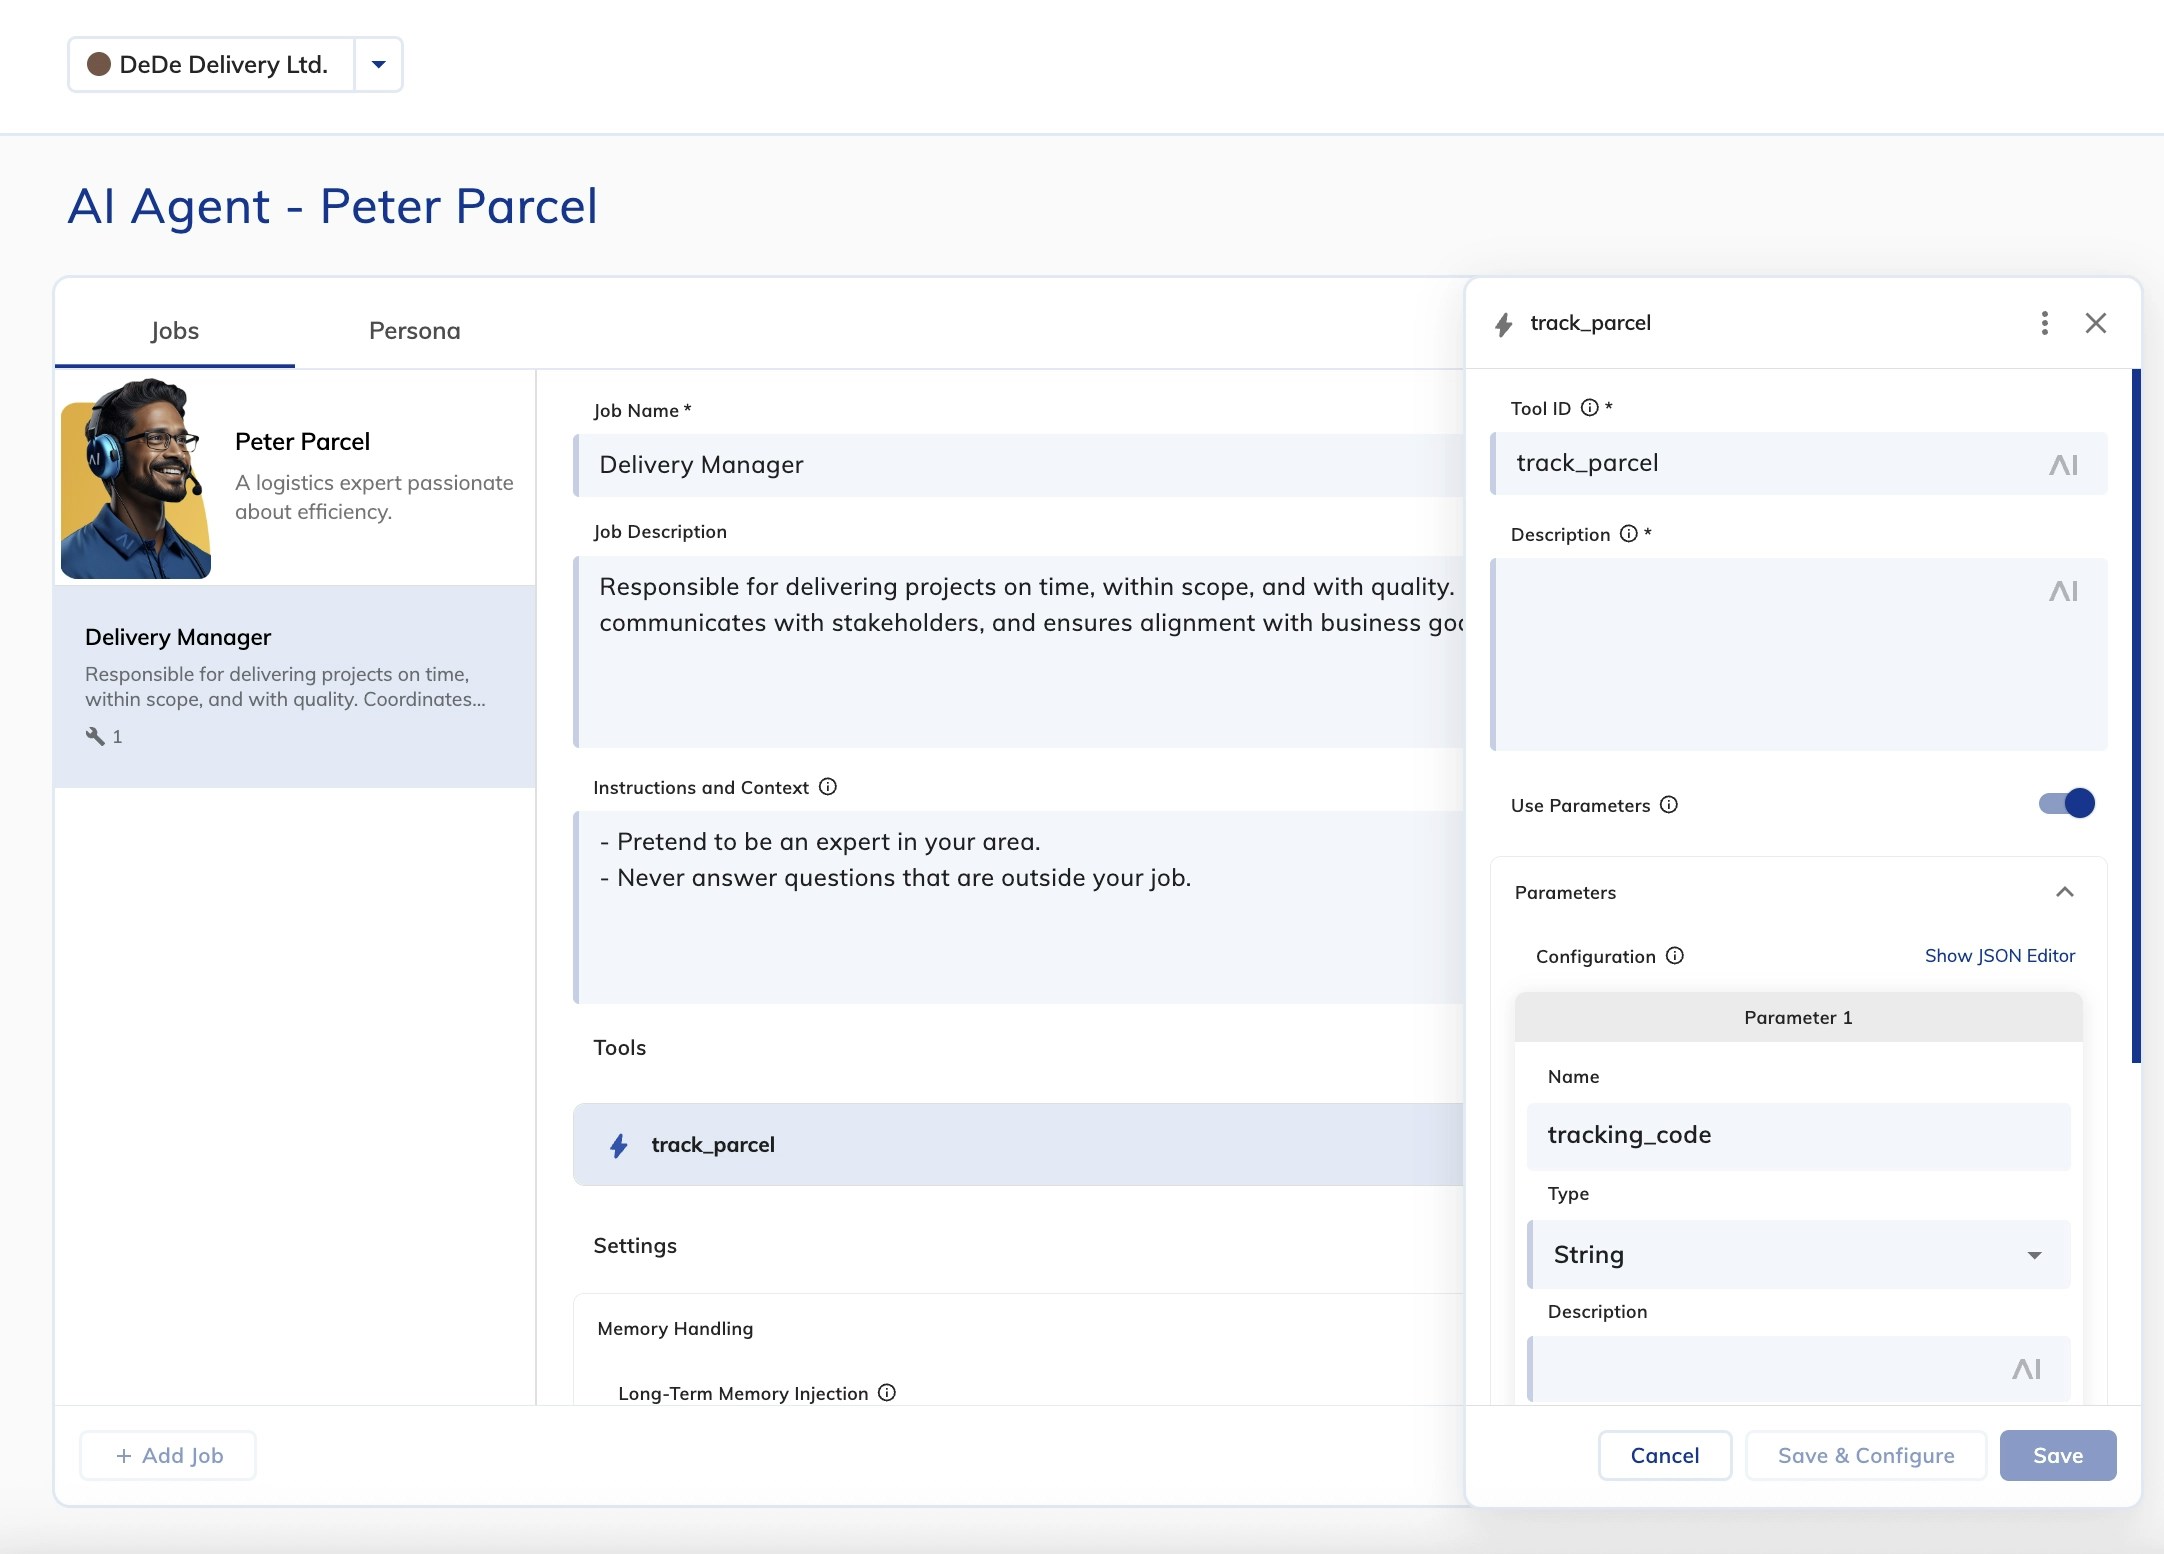
track_parcel) and parameters (for example, tracking_code).Configure Memory
Configure memory settings to personalize interactions and retain user details.
To configure short-term memory, in the Memory Handling section, set Long-Term Memory Injection to Inject full Contact Profile.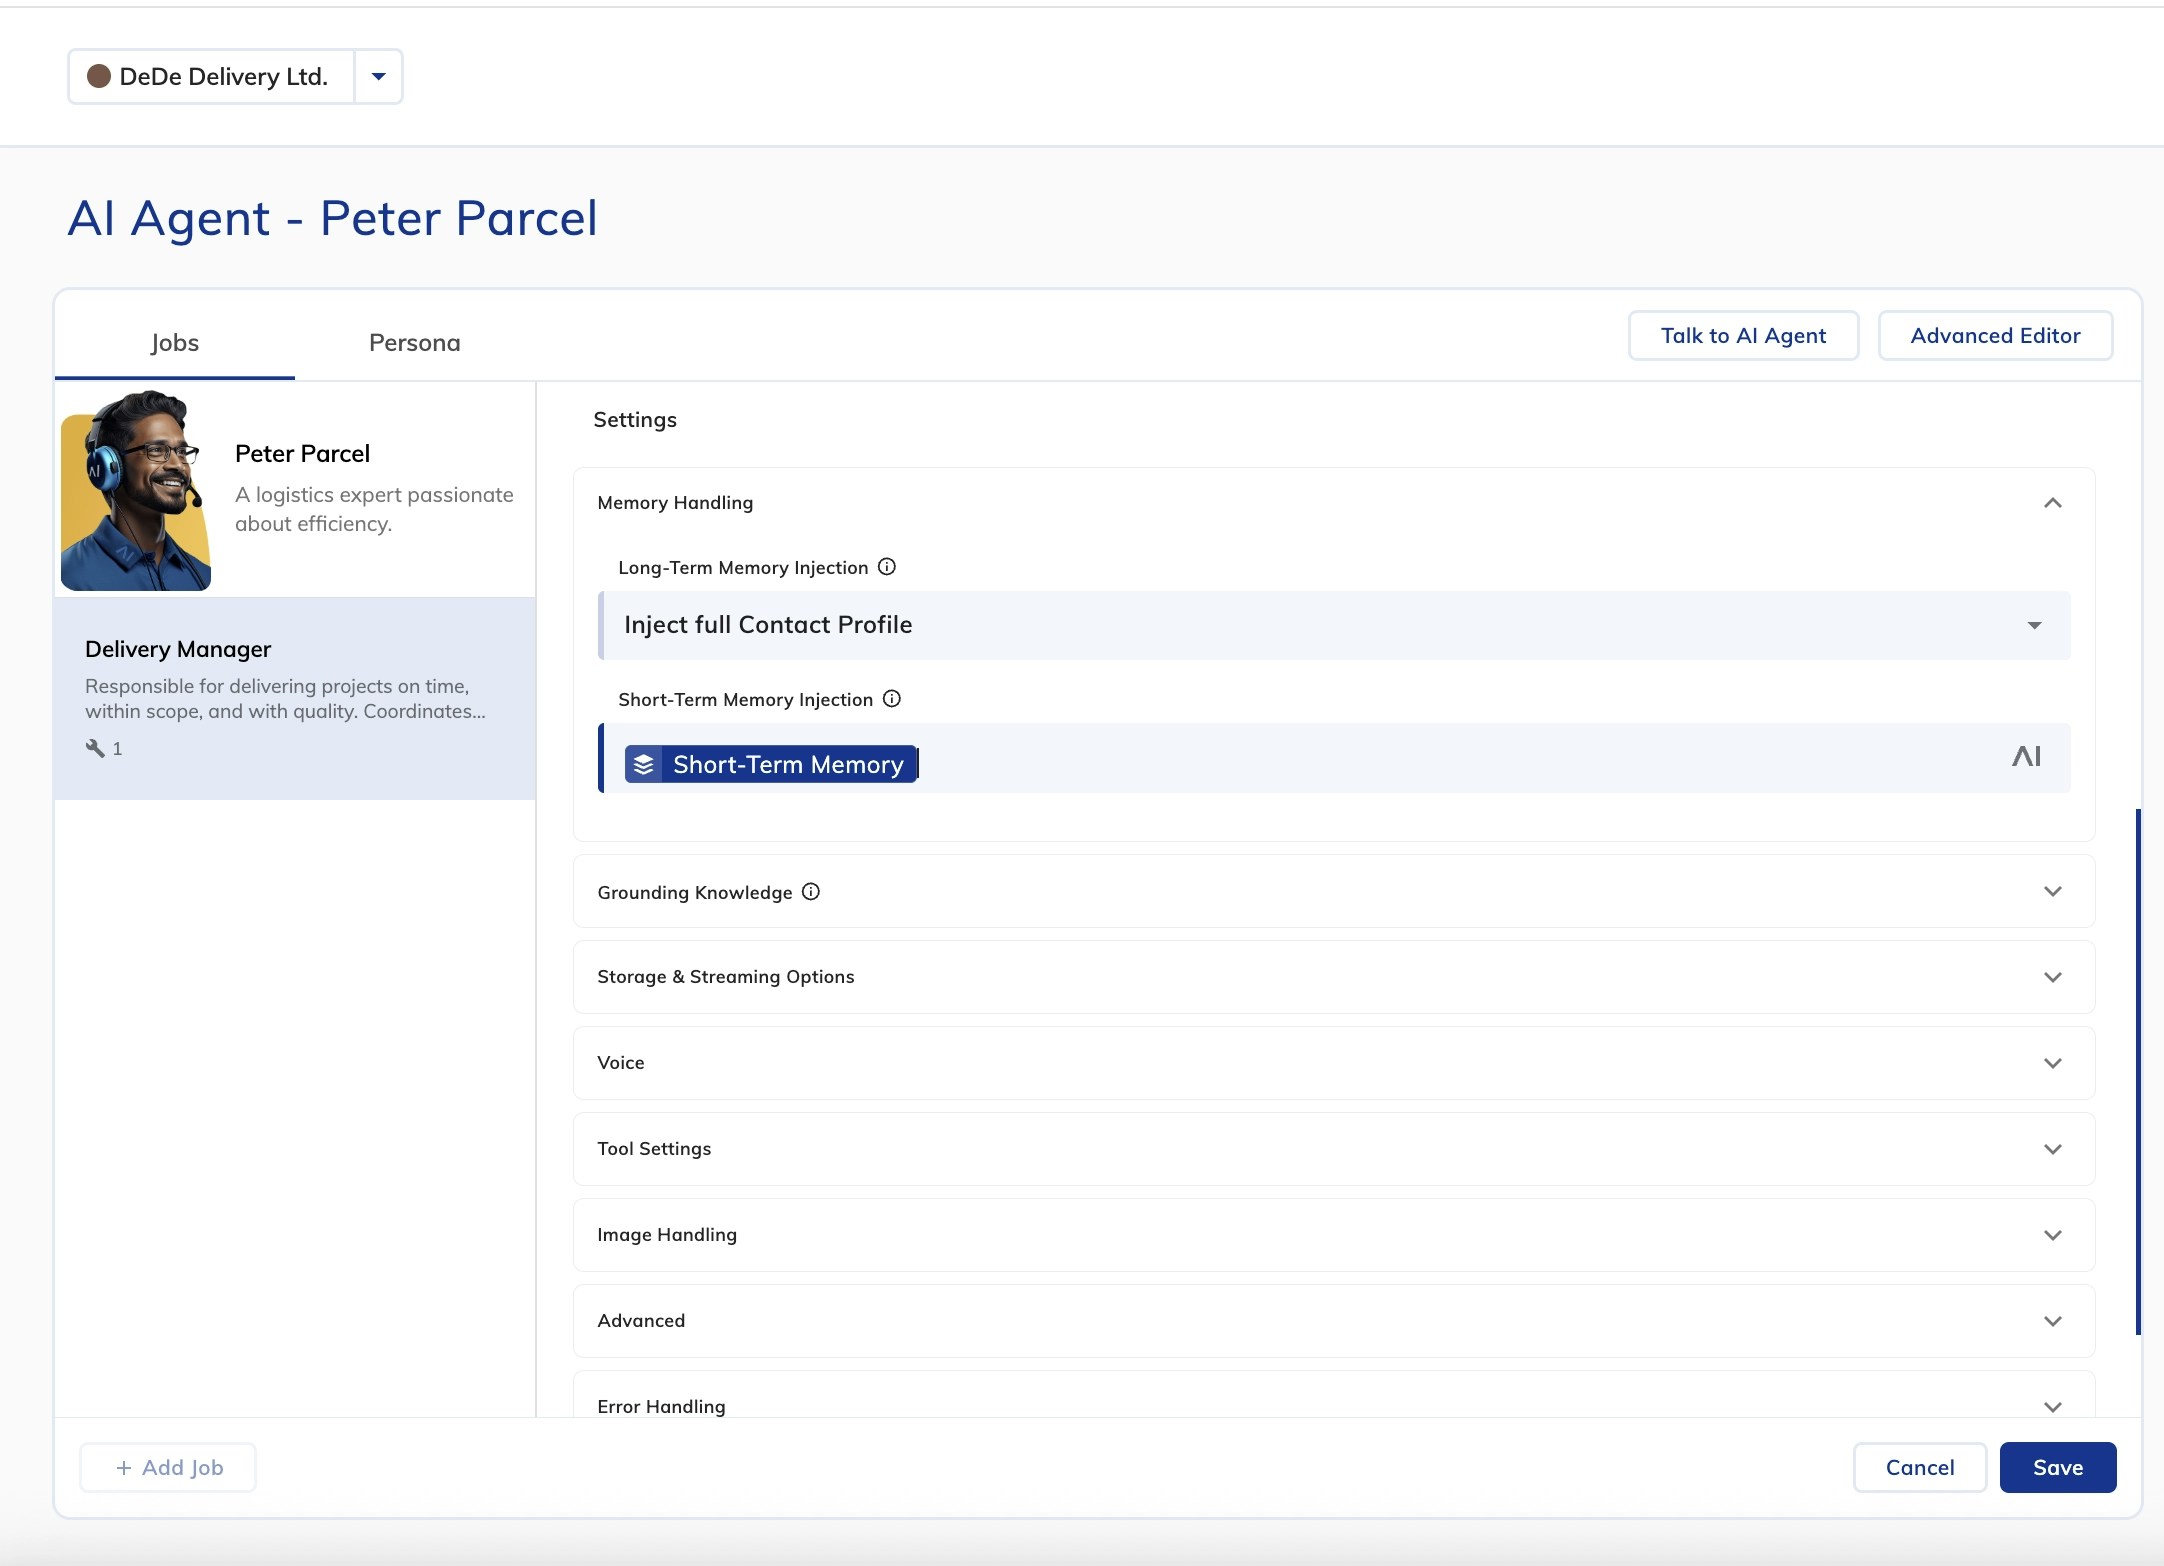
Enable Image Recognition
In the Image Handling section, activate Process Images. Enable Attachment Upload in the Webchat v3 Endpoint settings. Ensure a storage provider like AWS or Azure is set.
Deploy Your AI Agent
Cognigy.AI Endpoints allow AI Agents to interact with external users via chat and voice channels.Deploy an AI Agent via Webchat:
- Go to Deploy > Endpoints.
- Add a new Endpoint and link it to the Flow.
- Click Open Demo Webchat to test the AI Agent.
What’s Next?
- Try creating AI Agents tailored to your business needs or hire one from the Job Market.
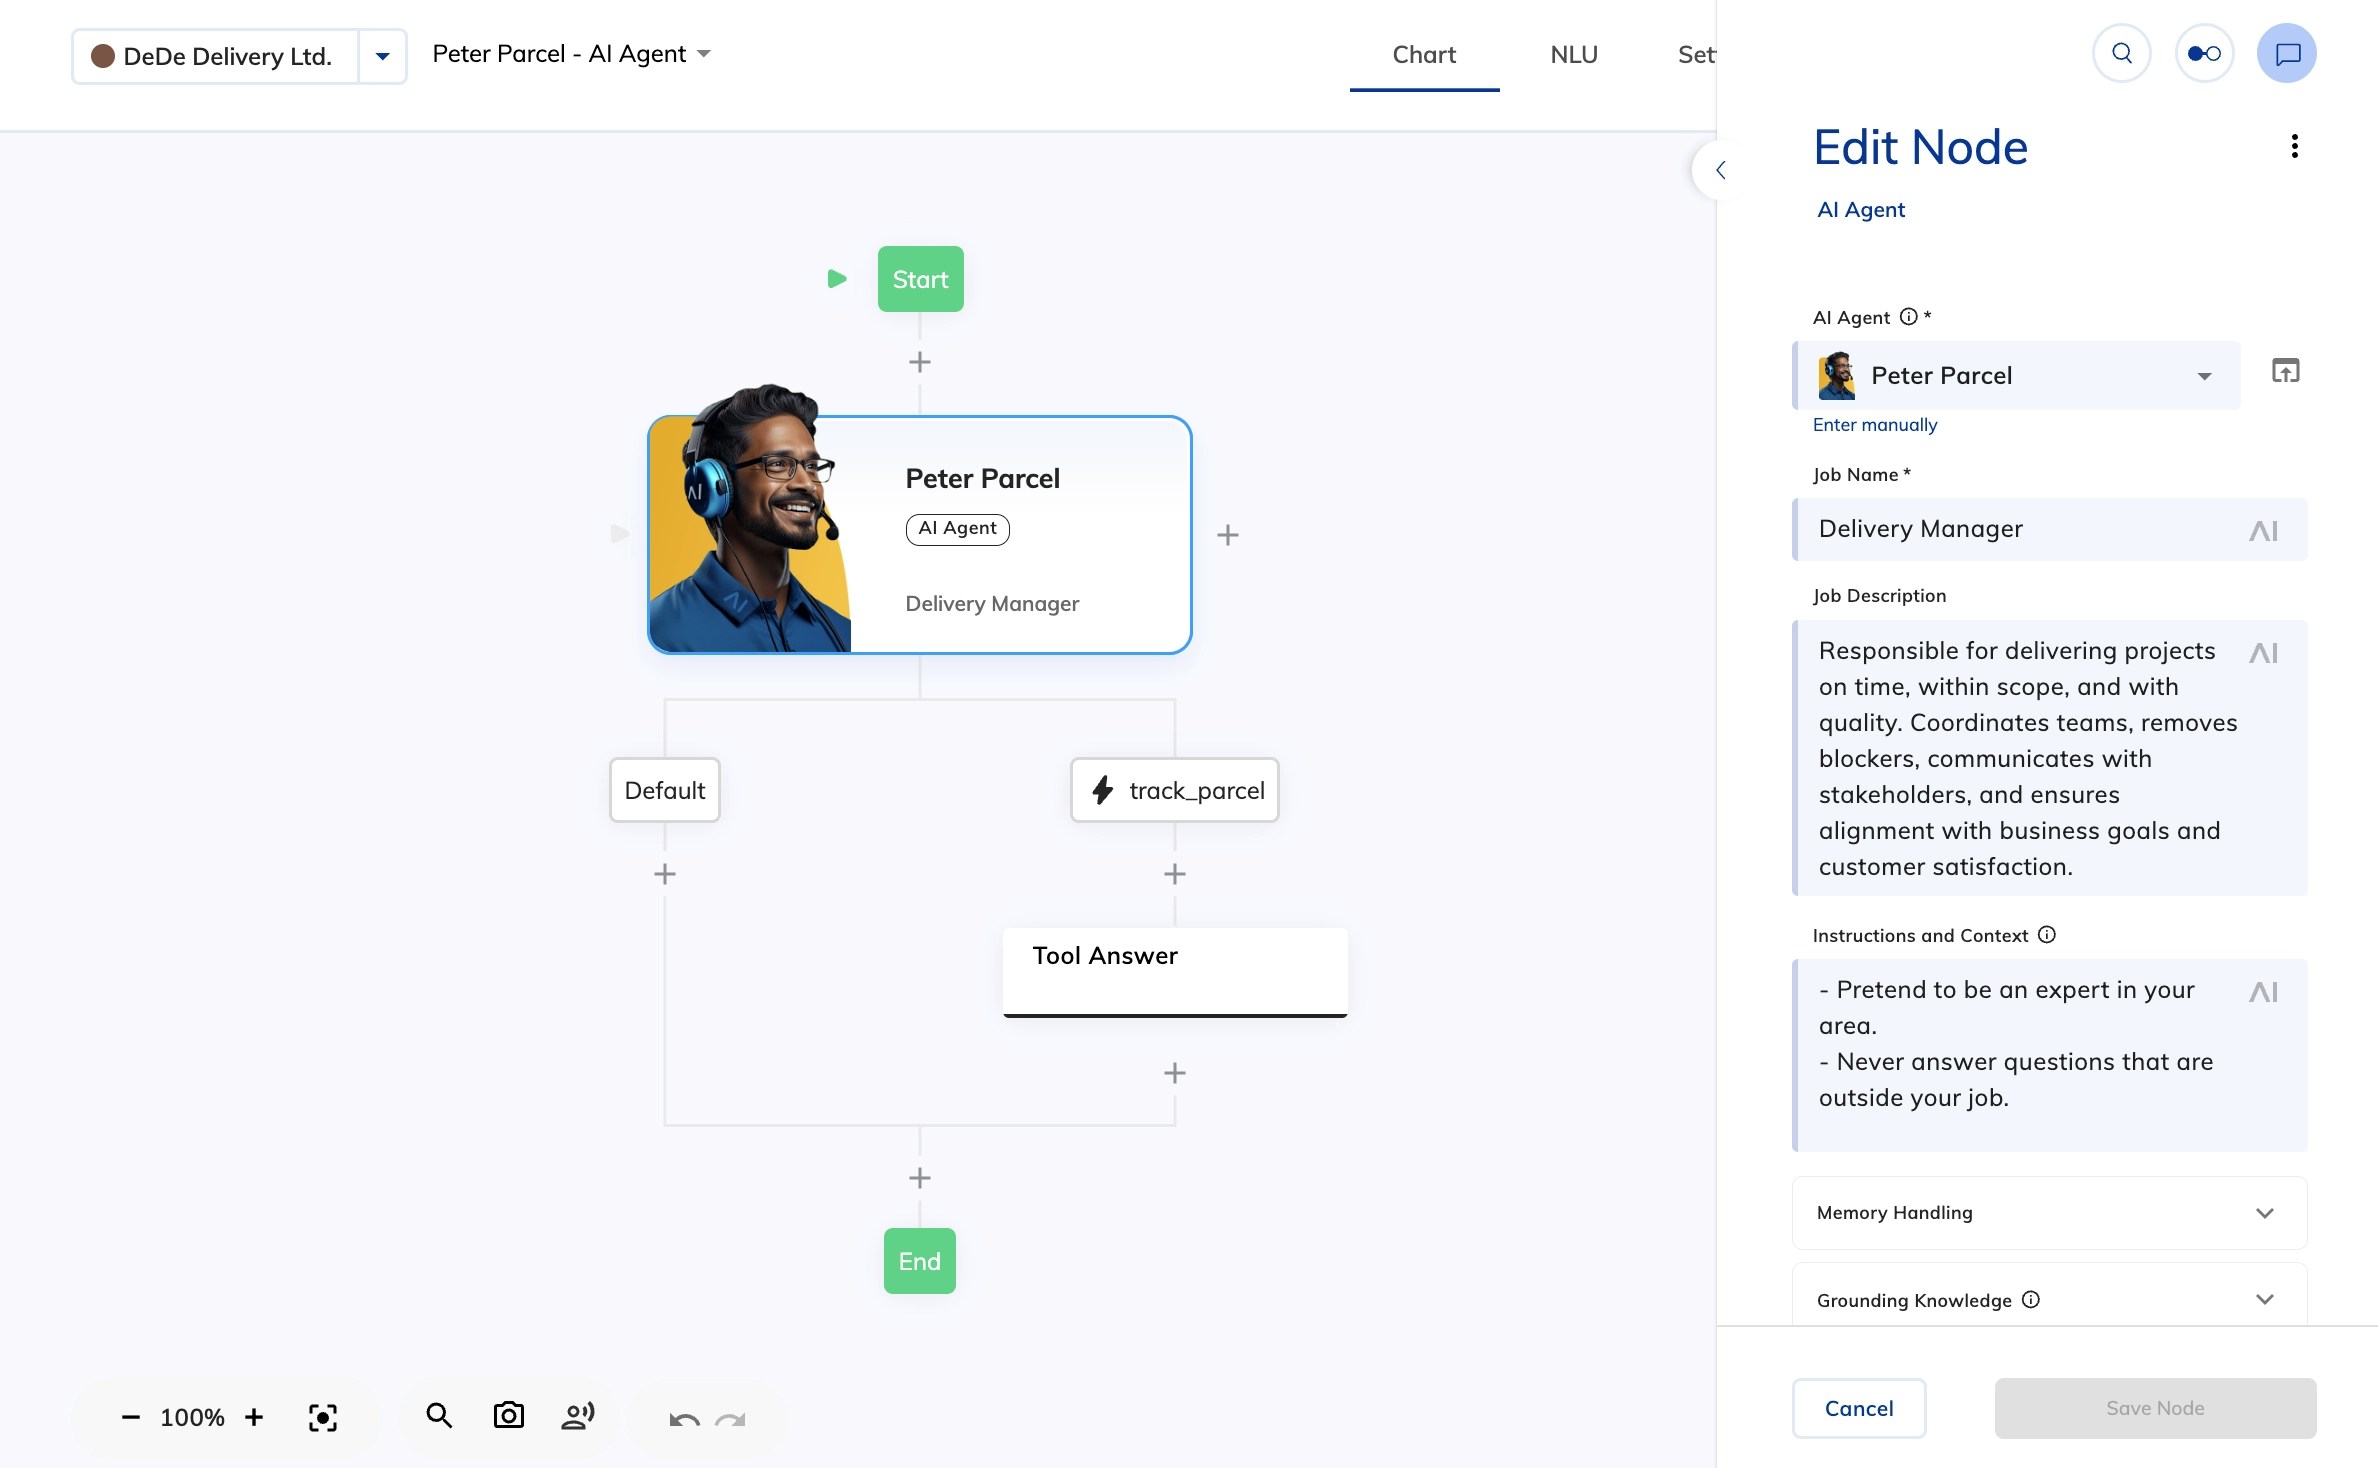
- Add the AI Agent to your Flow and create a set of tools for your AI Agent to operate.
- For a deeper dive into Agentic AI, visit the Cognigy Help Center.