- Label UI elements
- Add transcripts and captions for media files
- Increase text visibility
- Revise extensions
Label UI Elements
Remember to label all UI elements in your Webchat to explain their purpose clearly. Provide users with descriptive labels for each interactive element, including links, text on buttons, and forms. Make sure the visible and non-visible text is meaningful to help users navigate Webchat effectively. Include alternative (Alt) text to describe images for users who cannot see them. This text is pronounced by screen readers when hovering over the element. For example, include alternative text in the Say, Question, or Optional Question Nodes for images and other output types that contain images.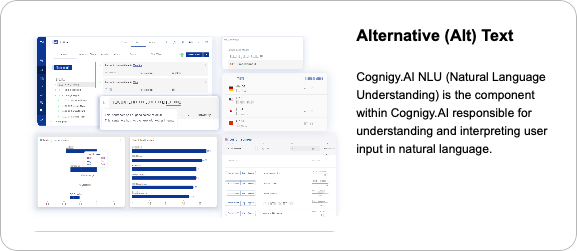
Aria Labels
Webchat v3 has aria labels to give access to screen readers or other assistive technologies to non-visible text. By default, the aria label texts are in English, but you can translate them to other languages or change them to other texts in the embedding configuration.Adaptive Cards
When you use the Adaptive Card output type in the Say, Question, or Optional Question Nodes, ensure that each field in Microsoft Adaptive Cards contains a title with meaningful text and that the text has a hierarchical structure. The following parameters need to be added to the JSON of the adaptive card:- Add the
speakparameter to ensure that screen readers announce a short summary adaptive card when it’s received or focused on. Without this parameter, screen readers announce each element, which can be hard to follow. - Each field contains the
labelparameter with meaningful text to title the field. - Meaningful text blocks contain the
styleparameter with a value ofheading. Headings help all users navigate and understand information more quickly as they create a hierarchical structure in an adaptive card. They improve content accessibility for visually impaired users, as screen readers announce them differently from a regular text.
Adaptive Card Sample
Adaptive Card Sample
Add Transcripts and Captions for Media Files
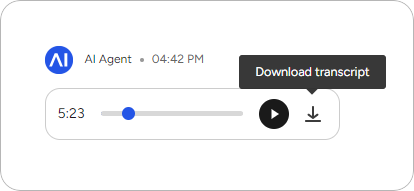
If you create an AI Agent that includes media content, such as a video clip or an audio track, try to support users with different accessibility needs in understanding this material. For video and audio, provide the same content in an alternate format, such as a transcript and captions.Audio
An audio track should be provided along with the transcript for this track. In the Say, Question, or Optional Question Nodes, for the Audio output type, add the audio file and paste the transcript into the Audio Alternative Text field. To convert your audio into text, you can use third-party tools such as Transcriptor, Sonix, and others. The audio transcript can have the following format:Audio Transcript Sample
Audio Transcript Sample
.txt format.
Video
A video clip should be provided along with the transcript and captions for this clip. In the Say, Question, or Optional Question Nodes, for the Video output type, add the video file, provide the alternative text (a downloadable transcript) and the URL for captions.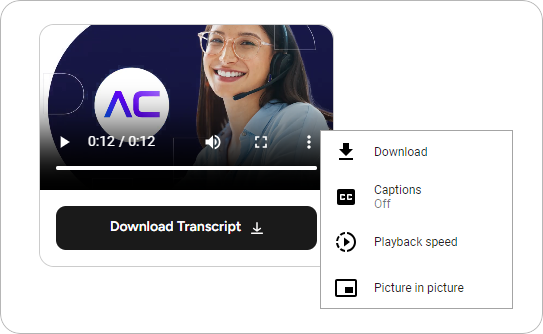
Transcript
In the Say, Question, or Optional Question Nodes, for the Video output type, you need to paste a video transcript into the Video Alternative Text field. To convert your video into text, you can use third-party tools such as Transcriptor, Sonix, and others. The video transcript can have the following format:Video Transcript Sample
Video Transcript Sample
.txt format.
Captions
Captions are designed to make content accessible to people who are deaf or hard of hearing, and they include not only spoken dialogue but also relevant non-verbal audio cues. In the Say, Question, or Optional Question Nodes, for the Video output type, you need to paste a URL, which links to the captions, into the Captions URL field. To create captions, you can use YouTube. Upload a video, and once the captions are generated, go to Subtitles in YouTube Studio. Click the video, and then select Download to export the captions in.vtt format.
Alternatively, you can use Veed.io and Kapwing to generate, edit, and export captions in .vtt format.
The file that includes captions should have the following .vtt format:
Video Captions Sample
Video Captions Sample
Increase Text Visibility
Text Resizing
Webchat supports relative font sizes to ensure that users can adjust the font size to their needs using their browser settings. If you want to customize the font size in your Webchat widget, you need to make sure that both the Webchat CSS customization and the HTML code of your website work properly with relative font sizes. To do this, you must:- Use relative font size units, for example,
emorreminstead ofpxin the Webchat CSS customization options. - Avoid absolute pixel values in the HTML tag embedding the Webchat widget or set
font-sizeto100%. These approaches allow font sizes to adapt to user preferences. For more details, refer to the Webchat v3.25.0 release notes.
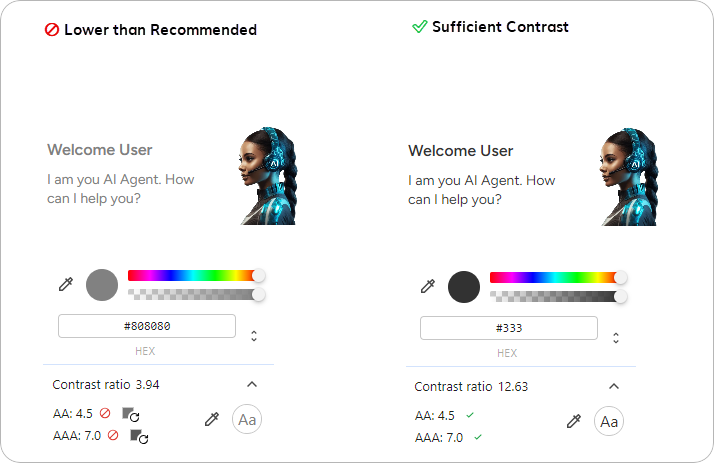
Guarantee Color Contrast
By default, Webchat v3 adheres to color contrast guidelines, ensuring a clear difference in brightness between a text and its background. This means that if a dark color is used as the primary background in Webchat, the text will automatically be light, and vice versa. However, if you customize the Webchat widget’s home screen, for example, with a colorful background image, ensure that the text and icons in the foreground remain visible. Use the Color section in the Endpoint Settings or the CSS customization options to ensure color contrast. To ensure color contrast for text, follow these guidelines:- The minimum contrast ratio for normal text is 4.5:1. Avoid using text smaller than 12px.
- For larger text, the contrast ratio should be at least 3:1.
- Open Chrome DevTools by right-clicking on the web page and select Inspect, or press Ctrl + Shift + I (Windows/Linux) or Cmd + Option + I (Mac).
- In the Elements panel, hover over the HTML elements to highlight sections of the page or click the specific element you want to inspect.
- In the Styles panel on the right, find the
colorproperty for the text or thebackground-colorproperty for the background. - Click the color swatch next to the
colororbackground-colorvalue to open the color picker. - Look for the Contrast Ratio section below the color values in the color picker. The contrast ratio will be displayed, showing whether the colors meet the WCAG guidelines:
- Passes — shows a checkmark ✅ if the ratio meets AA or AAA standards for normal or large text.
- Fails — shows a prohibited symbol 🚫 if the ratio does not meet AA or AAA standards for normal or large text.
- Use the color picker to adjust the color values. This tool updates the contrast ratio in real-time, helping you find a compliant color combination. Alternatively, to determine a color click the eyedropper icon, pick a color from anywhere on your screen and use WebAIM Contrast Checker to check the color compatibility.