

Limitations
- The maximum number of runs per simulation is 150.
- The maximum number of schedules per scenario is 1.
- Cognigy deletes simulation results after 90 days.
- For simulations that use a Snapshot, the Simulator uses the Project Locale, not the Snapshot Locale.
- If the Snapshot Locale differs from the Project Locale, and both Locales exist in the Snapshot and in the Project, the Simulator uses the Project Locale.
- If the Project Locale was created after the Snapshot was taken, this Locale doesn’t exist in the Snapshot, so the Simulator can’t use it for the simulation.
Run a simulation
After creating a scenario, you can start a simulation manually or schedule regular simulations.A scenario that Cognigy generated from a flow can run only against a flow. A scenario that Cognigy generated from an agent can run only against an agent. Scenarios that you create manually can run against both. This applies to single and multivariate simulations and to schedules.
- Single – runs one scenario with one configuration.
- Multivariate – runs 2 to 10 variants in one batch and compares the results. Use variants to compare LLMs, Snapshots, Locales, or targets.
- Single
- Multivariate
To start a single simulation, follow these steps:
- In your Project, go to Test > Simulator > Scenarios.
- Do one of the following:
- Click the Configure simulation icon in the row of the scenario.
- Click Configure simulation in the upper-right corner of the page.
- On the Configure simulation page, make sure the Single tab is selected.
- Verify the selected scenario or select a different one. In the Simulation name field, enter a name for the simulation. The name is required and can have up to 200 characters. The name is shown on the Simulations tab and on the Dashboard.
- In the Agent settings section, configure the target of the simulation:
- Target type – select the agent or flow for the simulation. The list shows agents and flows. To narrow the list, search or filter by Agents or Flows. If agent targets aren’t available in your environment, the list shows only flows.
- Snapshot – to test a target from a specific version instead of the current one, select a Snapshot. To use the current version, select No snapshot.
- Locale – select the Locale that defines the language of the agent and the simulated user. If you also select a Snapshot, see Limitations for how the Simulator resolves the Locale.
- Simulation LLM – select the model to manage the simulated conversation.
- In the Simulation run settings section, use the Simulation runs slider to set how many times the simulation runs. The default value is 10. The minimum value is 1 and the maximum value is 150. Use multiple simulation runs to test conversation variations. To activate mocking for Nodes that have mock code configured, turn on Mocking. Mocking is currently available only for the target type Flow.
- (Optional) In the Advanced section, configure additional parameters:
- Stop condition – stop the simulation early. Select None, Stop if pass rate < 30%, Stop if pass rate < 50%, Stop after 3 consecutive failures, or Stop after 5 consecutive failures.
- Agent output timeout – set the maximum time the agent has to respond to each user input during the simulation, in milliseconds. The minimum value is 20,000 milliseconds and the maximum value is 200,000 milliseconds. This parameter is available only for the target type Flow.
- Custom data payload – define a JSON object that is injected into every input message during a simulation. This parameter enables context-aware testing, for example, testing different user types, A/B scenarios, or personalized flows, without changing the flow itself. Examples of custom data payloads:
- Click Run simulation. When the simulation starts, Cognigy opens the simulation overview, where you can view the real-time results.
The maximum number of turns isn’t a setting of the simulation. You set it in the scenario with the Max turns slider. The slider range is 1 to 30, and the default value is 15.
Evaluate results
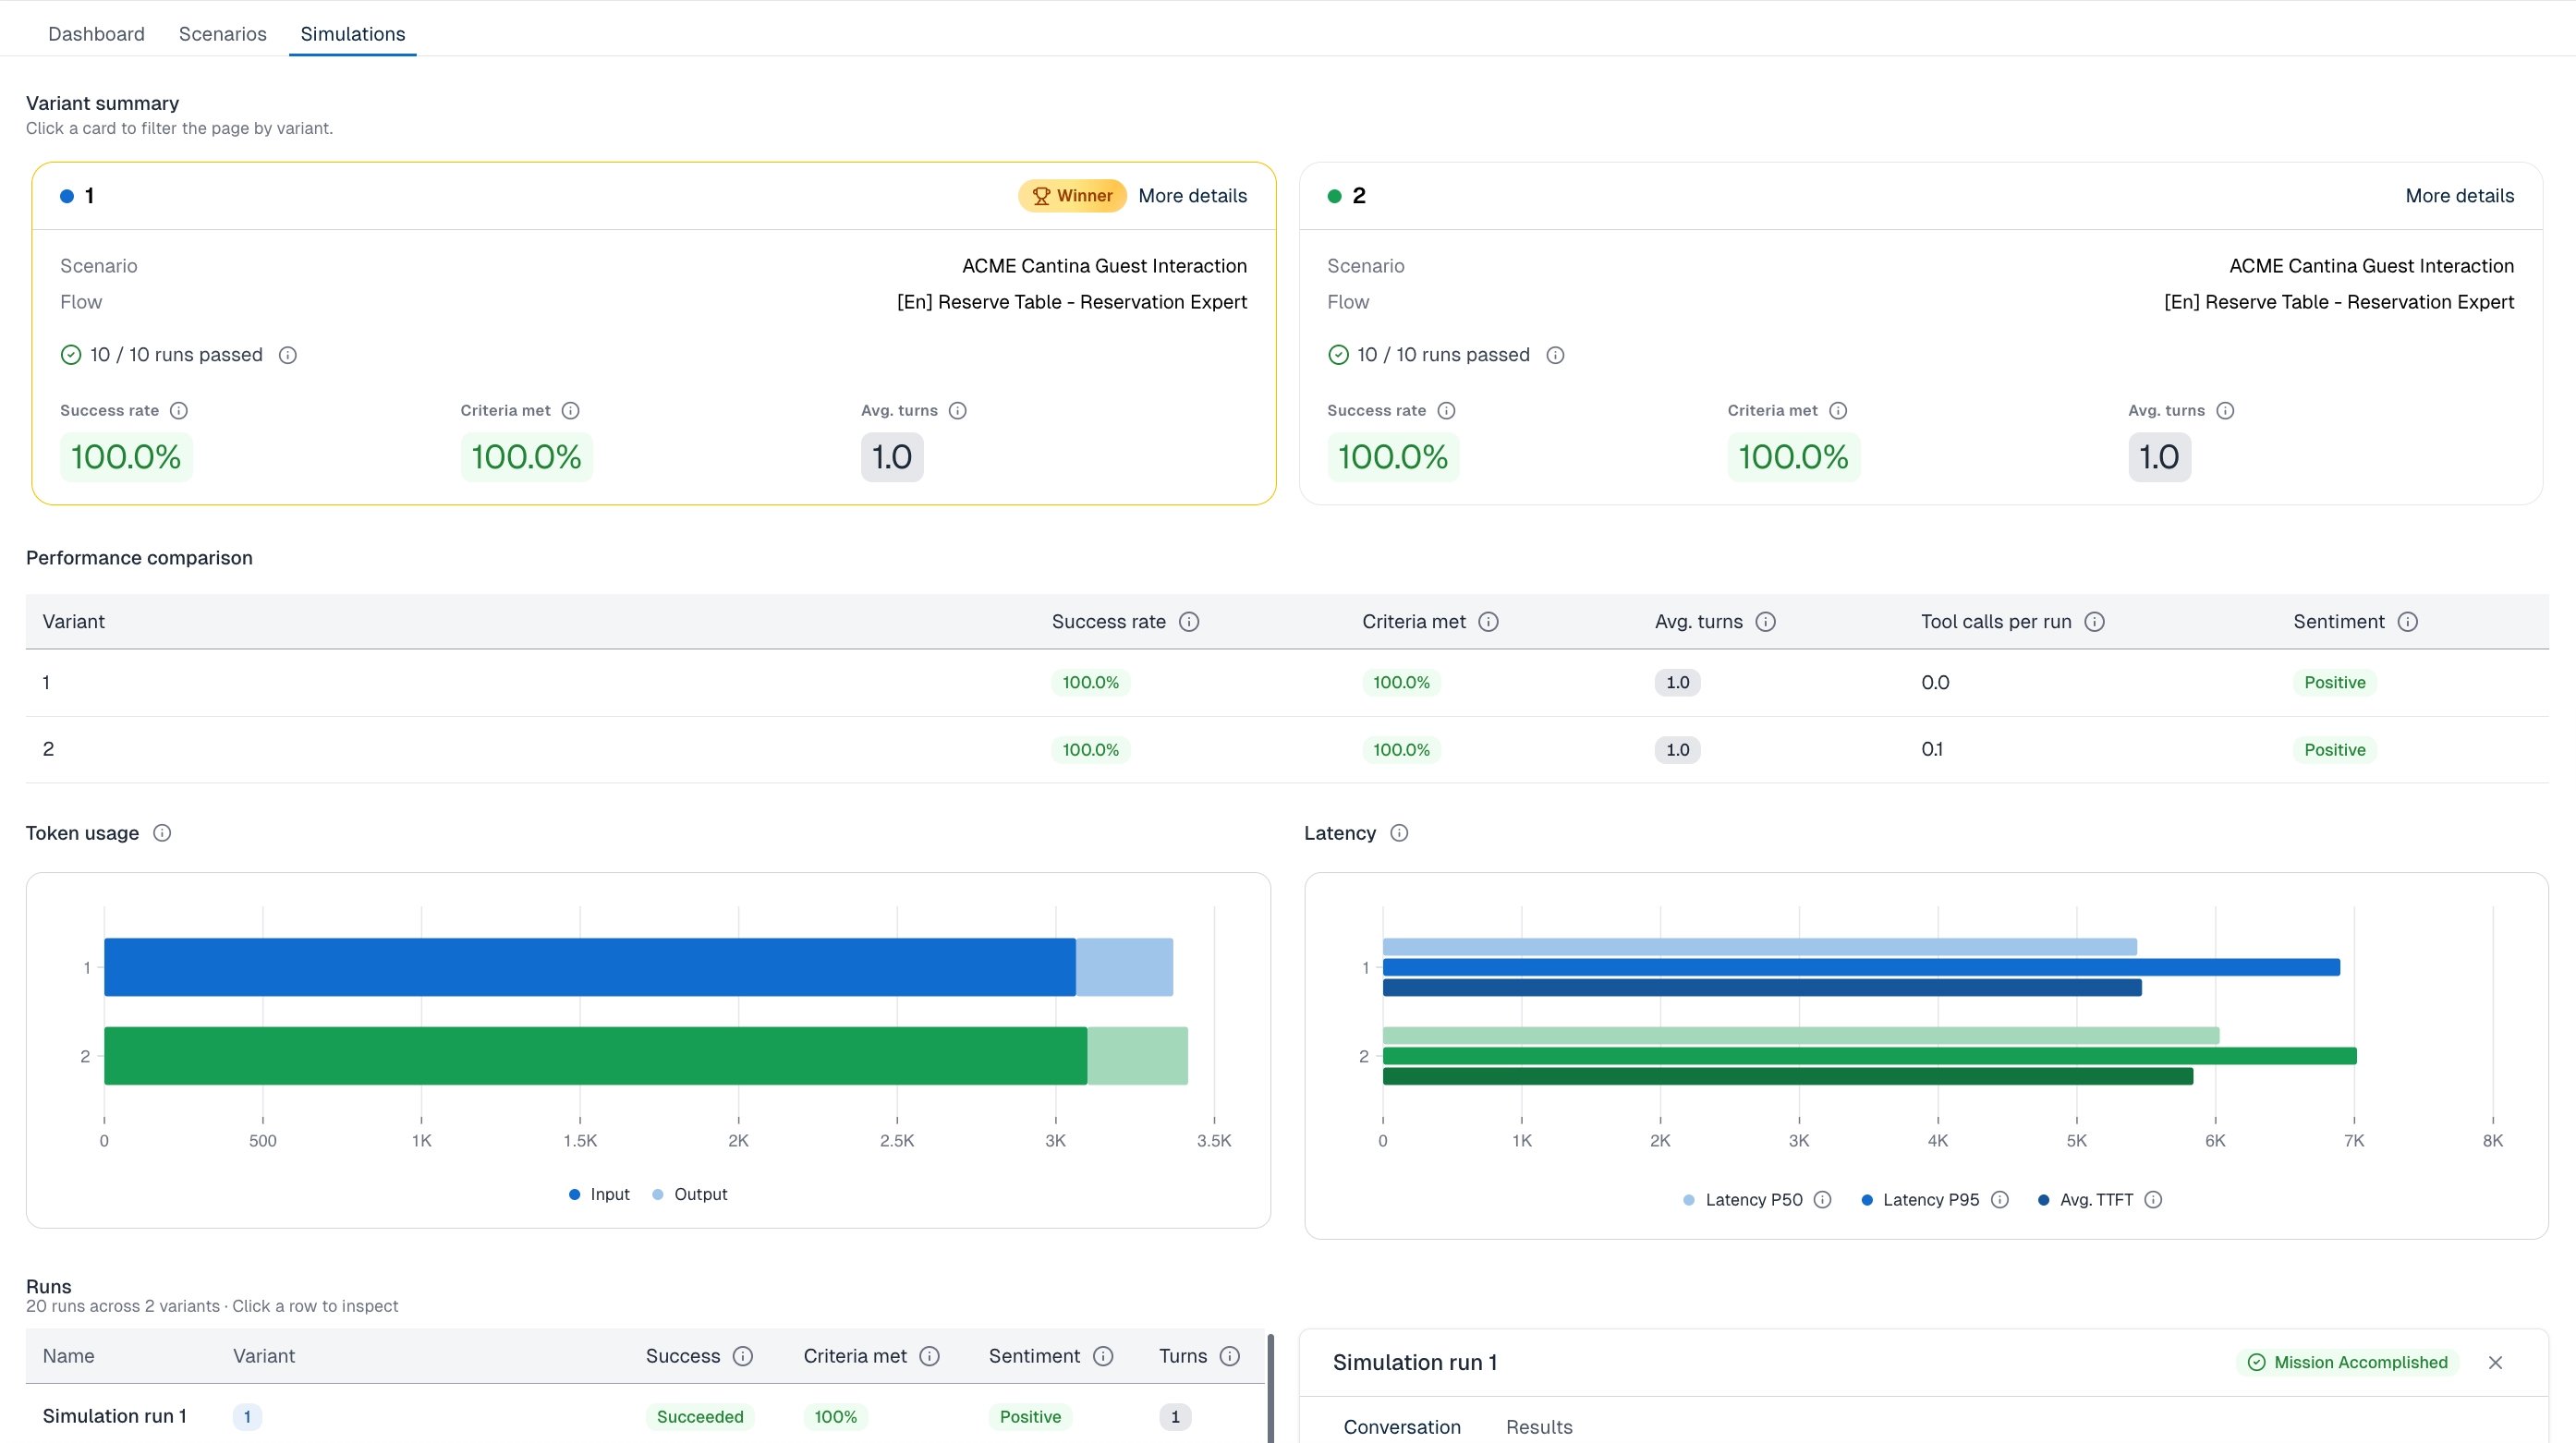
On the Simulations tab, the Type column shows whether a simulation is Single or Multivariate. The results open in a different view for each type.- Single
- Multivariate
While a simulation runs, the header shows the number of finished runs, for example,
3/10, and the results update automatically.The simulation overview provides the following key metrics:Review simulation runs
The Runs table lists the simulation runs with the following columns: Name, Success, Criteria met, Sentiment, and Turns. In multivariate simulations, the table also has the Variant column. To find failed simulation runs, look for the statusFailed in the Success column. Click a simulation run to open a panel on the right:
- On the Conversation tab, view the simulated conversation.
- On the Results tab, view each success criterion with the status
SucceededorFailed. Hover over the status to see a tooltip that explains why the simulation run met or didn’t meet the success criterion.
- In a single simulation, click the bar or slice that represents the data you want to investigate. The Runs table shows the active filters. To remove them, click Clear all filters.
- In a multivariate simulation, click a variant card. To remove the filter, click Clear filter.
Schedule simulations
After you create a scenario, you can schedule simulations to run automatically at a specified frequency. To schedule a simulation, follow these steps:- In your Project, go to Test > Simulator > Scenarios.
- In the row of the scenario that you want to schedule, click the Schedule scenario icon. The Schedule panel opens. If the scenario has a schedule, the panel opens on the Schedule tab.
- Configure the settings on the following tabs in the Schedule panel. Then click Save.
On the simulation tab
On the simulation tab
- Configure the following:
- Name – enter a name that reflects the test scenario and focus area. Example:
Menu Exploration – Exotic Dish Focus. Each time the schedule runs, Cognigy appends the date and time of the run to the name. The full name appears on the Simulations tab and the Simulator dashboard. - Target type – select the agent or flow for the simulation. The list shows agents and flows. A scenario that Cognigy generated from a flow can run only against a flow. A scenario that Cognigy generated from an agent can run only against an agent.
- Snapshot – select the Snapshot for the simulation. To use the current version, select No snapshot.
- Locale – select the Locale that defines the language of the agent and the simulated user.
- LLM – select the model to manage the simulated conversation.
- Simulation runs – use the slider to set how many times the simulation runs. The default value is 10. The minimum value is 1 and the maximum value is 150. Use multiple simulation runs to test conversation variations.
- Mocking – activate mocking for Nodes that have mock code configured. This option isn’t available for agent targets.
- Name – enter a name that reflects the test scenario and focus area. Example:
- (Optional) In the Advanced section, configure additional parameters:
- Agent output timeout – set the maximum time the agent has to respond to each user input during the simulation, in milliseconds. The default value is 20,000 milliseconds. The minimum value is 20,000 milliseconds and the maximum value is 200,000 milliseconds. This option isn’t available for agent targets.
- Custom data payload – define a JSON object. Cognigy injects it into every input message during a simulation. Use this parameter for context-aware testing, for example, to test different user types, A/B scenarios, or personalized flows without changing the flow itself. Examples of custom data payloads:
On the schedule tab
On the schedule tab
- Toggle on Activate schedule.
- Configure the following:
- Frequency – select one of the following options:
- Daily (default)
- Every 3 days
- Weekly
- Bi-weekly
- Monthly
- Time – select the time when the simulation starts. The default time is 09:00.
- Next scheduled run – shows the date and time of the next simulation, based on the Frequency and Time parameters. The date and time use the time zone of the Project.
- Email notifications – enter the email addresses for notifications about completed scheduled simulations. Press Enter after each address.
- Frequency – select one of the following options:
You can schedule only single simulations. Schedules don’t support multivariate simulations or stop conditions.
POST /simulations/{simulationReference}/schedules request.
After you save the configuration, a clock icon appears next to the scenario name on the Scenarios tab. Hover over the icon to view the date of the next scheduled simulation.
Example
This example shows how to run simulations with the scenarios from the Scenarios example. We’ll work with Sophie, the Restaurant Guide.- Single
- Multivariate
-
Run a simulation for each scenario with the following settings:
- Check the results on the Simulator dashboard. Open each simulation run to review the outcomes. Pay attention to failed runs. For example, look at the simulation for the persona Maya – The Tourist Planner.
Troubleshooting
Common issues
Common issues
Azure content filter error
Azure content filter error
When you use an Azure OpenAI LLM for simulations, you may receive the following error message:
The response was filtered due to the prompt triggering Azure's content management policy.This error isn’t caused by Cognigy, it occurs because Azure’s content filter blocks the LLM prompt, also called system message, according to your subscription’s safety policy. The LLM prompt includes your simulation settings, for example, personas, missions, and success criteria.Best practicesAzure’s content filter blocks any content that it considers unsafe or ambiguous, including LLM prompts. The exact rules, scoring methods, or trigger terms used for the content filter aren’t disclosed. However, they include best practices in their system message documentation. The following table shows issues and best practices while configuring the scenario.How to resolve
- Review the simulation’s persona, mission, and success criteria. Make sure they comply with Azure’s best practices.
- Ask your Azure OpenAI administrator to review the content filter settings for the environment you’re using.