

Administrator role can create, edit, or delete Agent Copilot Bots in Live Agent.
Differing from other Agent Copilot assistants, a human agent can use multiple Agent Copilot Bots within a single conversation.
While the Agent Copilot assistants listen to the conversation and attempt to follow it,
an Agent Copilot Bot acts as an independent secondary bot with built-in logic to assist the human agent.
For instance, if the human agent requires additional expertise during the conversation,
they can activate a specialized Agent Copilot Bot, such as one for technical support or order processing.
Before you Begin
To use Agent Copilot Bots in a Live Agent conversation, you need to create two Flows and two Endpoints in Cognigy.AI that comply with the following conditions:- The Main Flow for interaction between an AI Agent and an end user. Within this Flow, add a Handover to Human Agent Node to transition the conversation from the AI Agent to a human agent. The Inbox ID must be included in the Handover to Human Agent Node.
- The Endpoint for the Main Flow.
- The Agent Copilot Bot Flow for interaction between an Agent Copilot Bot and a human agent.
- The Endpoint for the Agent Copilot Bot Flow.
Create Agent Copilot Bots
You can create multiple Agent Copilot Bots within an Inbox. To create an Agent Copilot Bot, do the following:- In the Live Agent interface, go to Settings > Inboxes.
- To edit the previously created Inbox settings, click Settings next to the Inbox.
- On the Settings tab, click Add Bots.
- In the Create Agent Copilot Bot window, fill in the following fields:
- Name — enter a unique name for your bot. This name is helpful if there are multiple bots within the same Inbox, allowing you to distinguish them easily.
- Endpoint Config URL — enter the URL copied from the Endpoint settings in Cognigy.AI. You can find and copy the Config URL in the Webchat Endpoint settings for the previously created Agent Copilot Bot Flow in Cognigy.AI.
- Click Add.
Use Agent Copilot Bots in Conversations
Note that you can use multiple Agent Copilot Bots within a conversation. Each bot creates a separate session that needs to be manually closed after ending the conversation. To use Agent Copilot Bots in a conversation, do the following:- Go to your conversation.
- At the top of the conversation window, click More Details.
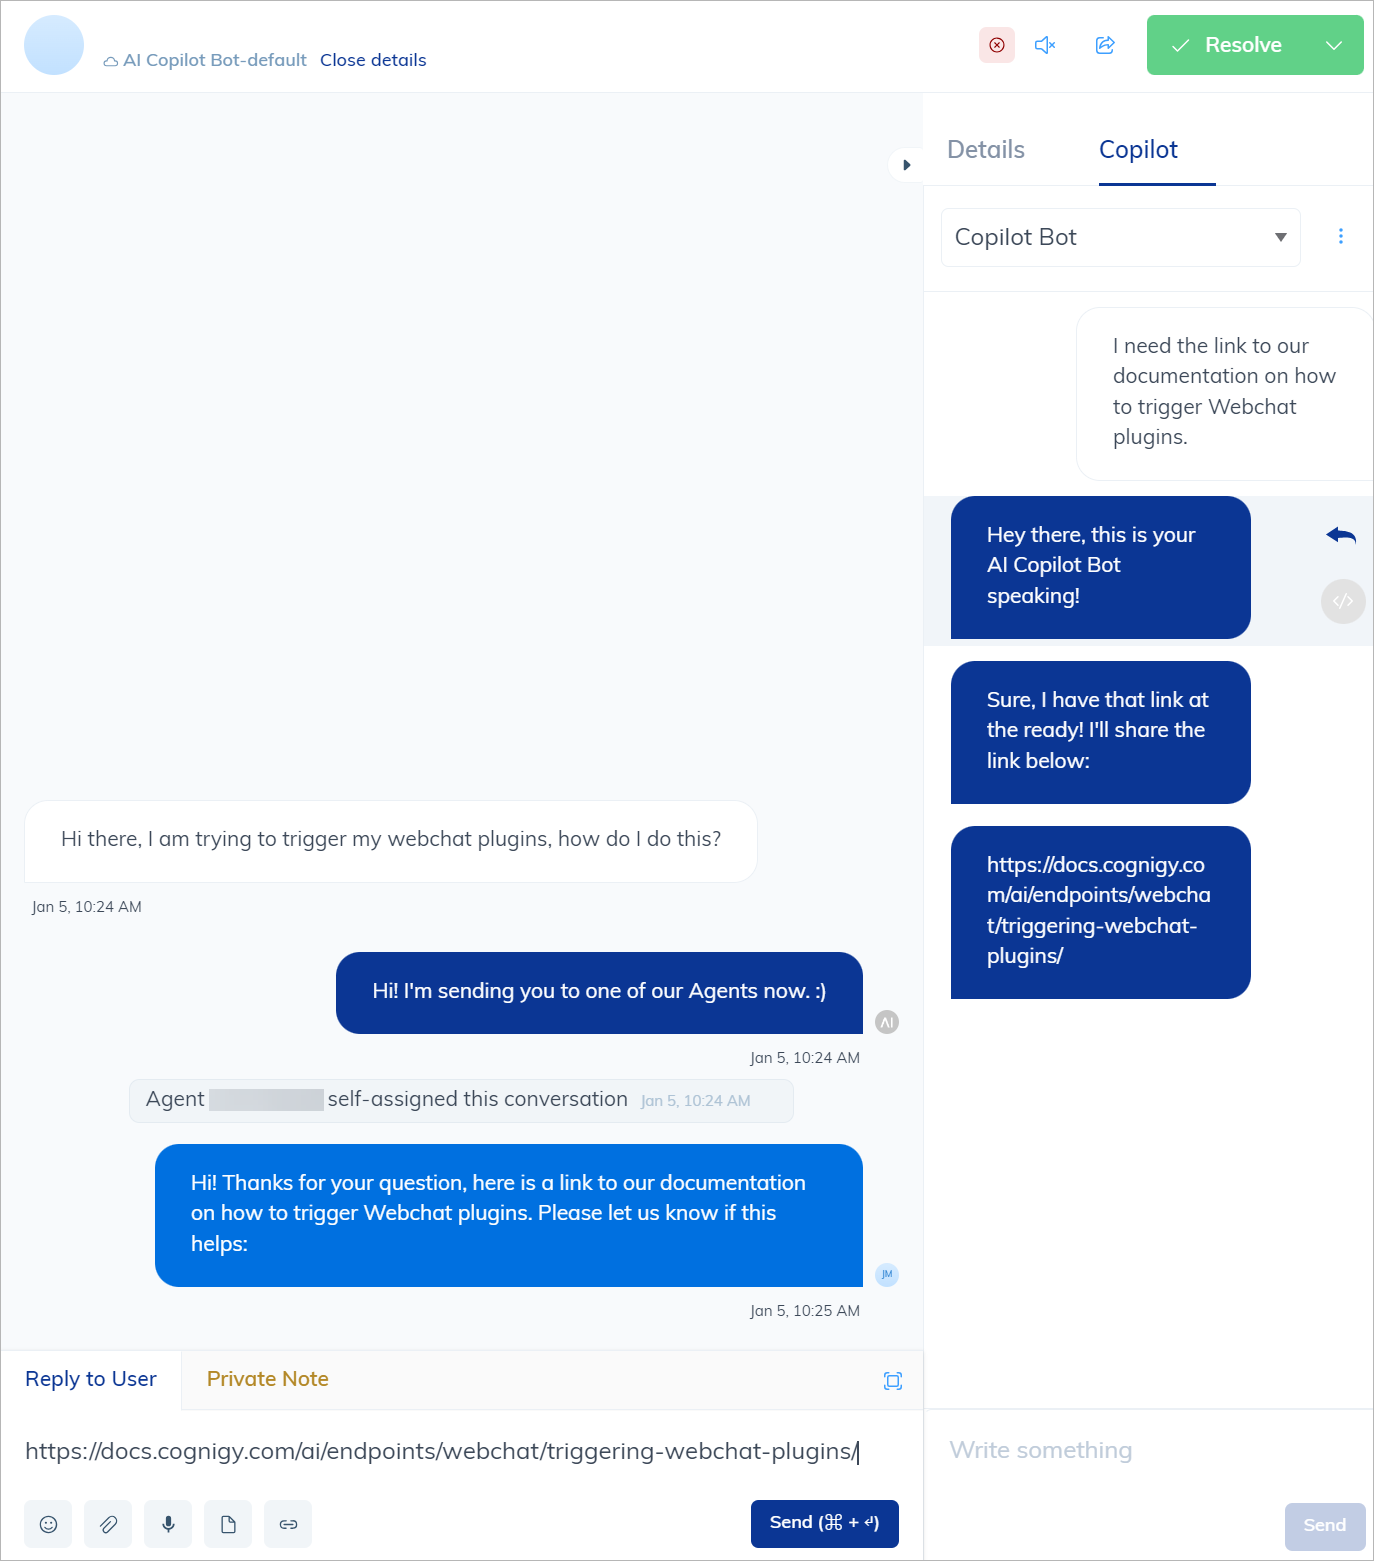
- On the right side of the Conversation Details window, select the Copilot tab.
- Open the dropdown list and select one of the available Agent Copilot Bots.
- In the Edit Message field at the bottom of the window, write your request to the Agent Copilot Bot. The Agent Copilot Bot performs research as configured in the Agent Copilot Bot Flow and sends back the result in a separate Live Agent chat, such as a product video, image, text, and more.
- To forward the provided content to the Live Agent conversation, click directly on the content item. It will be sent to the Reply to User field in the main conversation chat.
- Click Send to provide the content item to the customer in the main conversation chat.
Complete Agent Copilot Bot Sessions
To complete a session with Agent Copilot Bot, do the following:- Go to your conversation.
- At the top of the conversation window, click More Details.
- On the right side of the conversation window, select the Copilot tab.
- Click
 .
. - In the dropdown list, select Reset Session.
Send Transcripts to Assigned Agents
In case you want to send a conversation transcript to a specific email address or to the assigned human agents, do the following:- Go to your conversation.
- In the upper-right corner of the conversation window, click Send Transcript.
- In the Send conversation transcript window, select one of the following options:
- Send transcript to the assigned agent — the conversation transcript will be sent to a human agent currently assigned to handle the interaction. This is useful when you want the assigned human agent to have a record of the conversation for reference or follow-up.
- Send transcript to another email address — the conversation transcript will be sent to a different email address. This is helpful when you need to share the conversation details with someone other than the assigned human agent, such as a supervisor, team member, or any other relevant party.
- Click Submit.
The email transcript includes only the conversation history between a human agent and their customer. If the human agent calls an Agent Copilot Bot for help, that interaction takes place on a separate channel and in a different session, and it will not be included in the transcript.