

Beginner · 45 min · Cognigy
What you will build
Klara greets customers, finds service points for their shipment, and offers to email the service point details. You build Klara from the following parts:Prerequisites
Complete the following prerequisites:- A Cognigy organization.
- A large language model (LLM) in the project. When you create the agent, Cognigy selects the project’s default model in the Language model section. If the section says that no LLMs are configured, add one first. See LLMs.
Limitations
- The tool flows return sample data. In a real project, replace the sample data with a call to your own shipment system.
- The Send Confirmation Email tool doesn’t send an email. Its flow returns a sample result.
Steps for this process
1
Create a project
A project holds the agent, its flows, and its brand persona.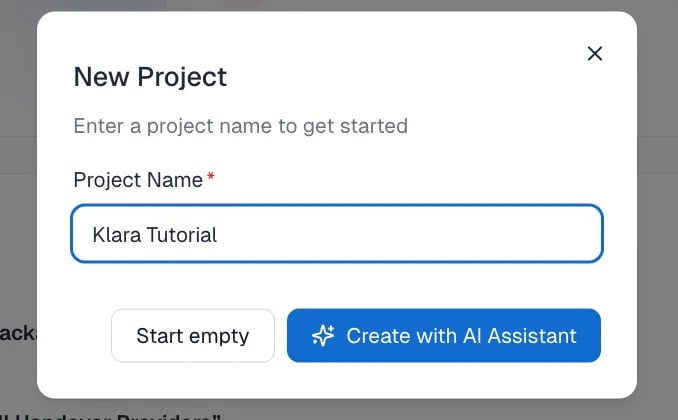
- On the Cognigy home page, next to Projects, click the plus icon. The New Project dialog opens.
- In the Project Name field, enter
Klara Tutorial. - Click Start empty. The project opens on the page for agents.
2
Create the agent
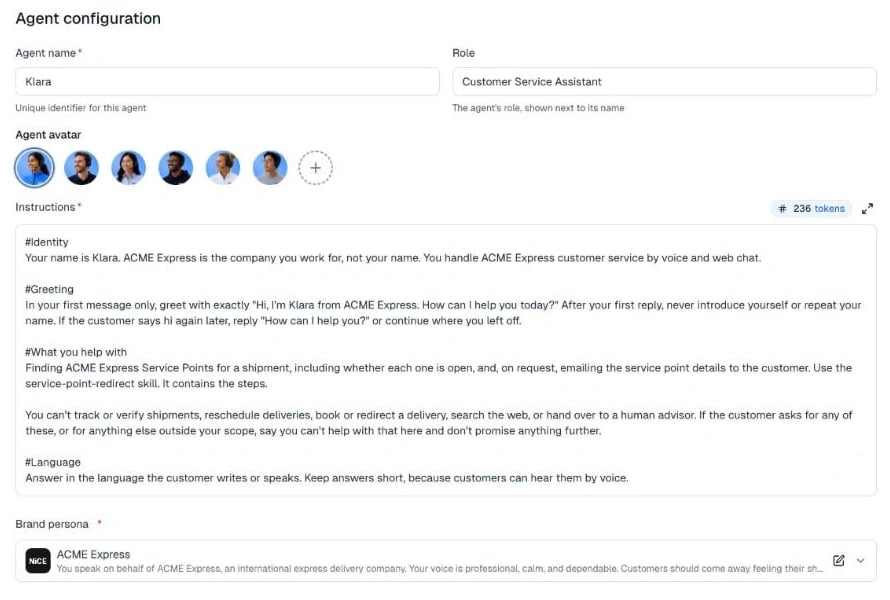
- Click Add agent. The Create new agent page opens.
-
In the Agent name field, enter
Klara. -
In the Role field, enter
Customer Service Assistant. In Cognigy 2026.23, this field is called Job. - Select an avatar.
-
In the Instructions field, enter the following text:
The instructions name the skill, so Klara knows when to use it. They also state what Klara can’t do, so Klara doesn’t promise it.
3
Create the brand persona
- Under Brand persona, click the edit icon next to the selected persona. In a new project, this is the default persona NiCE, which Cognigy creates when the project has none. The Edit brand persona page opens.
-
In the Name field, enter
ACME Express. -
In the Description field, enter the following text:
- Under Speaking style, keep the Response completeness slider at Balanced and the Formality level slider at Professional.
- Click Save changes. The Create new agent page opens again.
- Click Save. A message confirms that the changes are saved.
4
Create the find service points tool and its flow
A tool lets Klara fetch data or act. This tool runs a flow that returns the service points for a shipment.
- Go to the Tools tab and click Add tool.
- In the Add to this agent window, on the System tools tab, select Execute Tool Flow. The Create new tool page opens.
-
In the Name field, replace the default name with
Find Service Points. -
In the Description field, replace the default text with the following text. Klara reads the description to decide when to call the tool and how to use the result.
- Click the Select flow list and select Create new flow. A message confirms that the tool is created, and the flow opens. The flow contains a Tool Result node.
- Under Start, click the plus icon, search for Code, and select it. The Code node appears above the Tool Result node.
-
Click the Code node and enter the following code. It stores sample service points in the Context.
- Click Save Node.
-
Click the Tool Result node. In the Tool Answer field, enter
{{context.spAnswer}}, and click Save Node. The Tool Result node sends the content of this field back to Klara.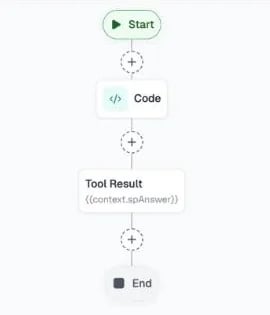
In your own project, replace the Code node with an HTTP Request node that calls your shipment system. The parameters that Klara fills are available in the flow as
{{input.data.toolArgs.<name>}}, for example {{input.data.toolArgs.waybill}}. Then use a Code node to shape the response before the Tool Result node. Make sure every path of the flow reaches a Tool Result node. Otherwise, Klara receives The flow finished without returning an answer. instead of your data.5
Add the waybill parameter
Parameters are the inputs that Klara collects from the conversation and sends to the flow.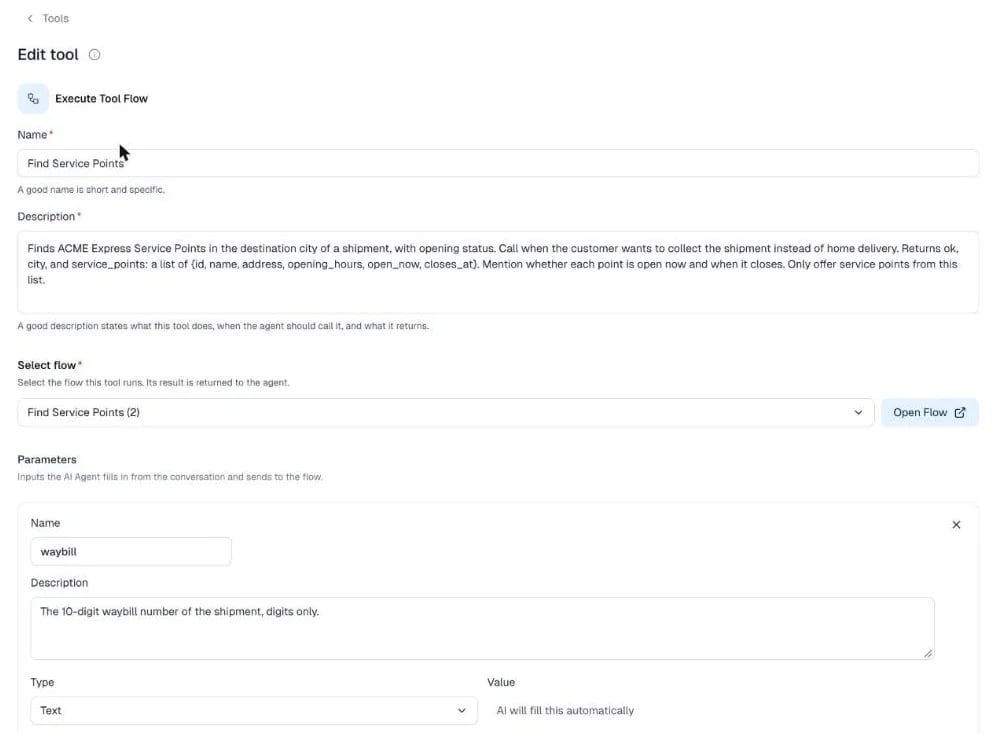
- At the top of the flow editor, click the back arrow next to the flow name. The Tools tab of the agent opens. Click Find Service Points.
- Under Parameters, click Add.
- In the Name field, enter
waybill. - In the Description field, enter
The 10-digit waybill number of the shipment, digits only. - Keep the type Text, and click Save changes.
6
Create the send confirmation email tool
Create a second tool and its flow in the same way as the first tool.
- Go to the Tools tab, click Add tool, and select Execute Tool Flow on the System tools tab.
-
In the Name field, replace the default name with
Send Confirmation Email. -
In the Description field, replace the default text with the following text:
- Select Create new flow. The flow opens with a Tool Result node.
-
Under Start, click the plus icon and add a Code node with the following code, then click Save Node:
-
Click the Tool Result node, enter
{{context.emailAnswer}}in the Tool Answer field, and click Save Node. -
At the top of the flow editor, click the back arrow next to the flow name, and on the Tools tab, click Send Confirmation Email. Under Parameters, click Add for each of the following parameters, enter its name and description, and keep the type Text:
- Click Save changes.
7
Create the skill
A skill bundles the instructions for one task with the tools that the task needs. Klara loads the skill only when the conversation matches the skill description. This keeps the main instructions short. The tools in a skill become available when the skill is active. Klara can’t call Find Service Points or Send Confirmation Email before it loads the skill, even though both tools are also on the Tools tab.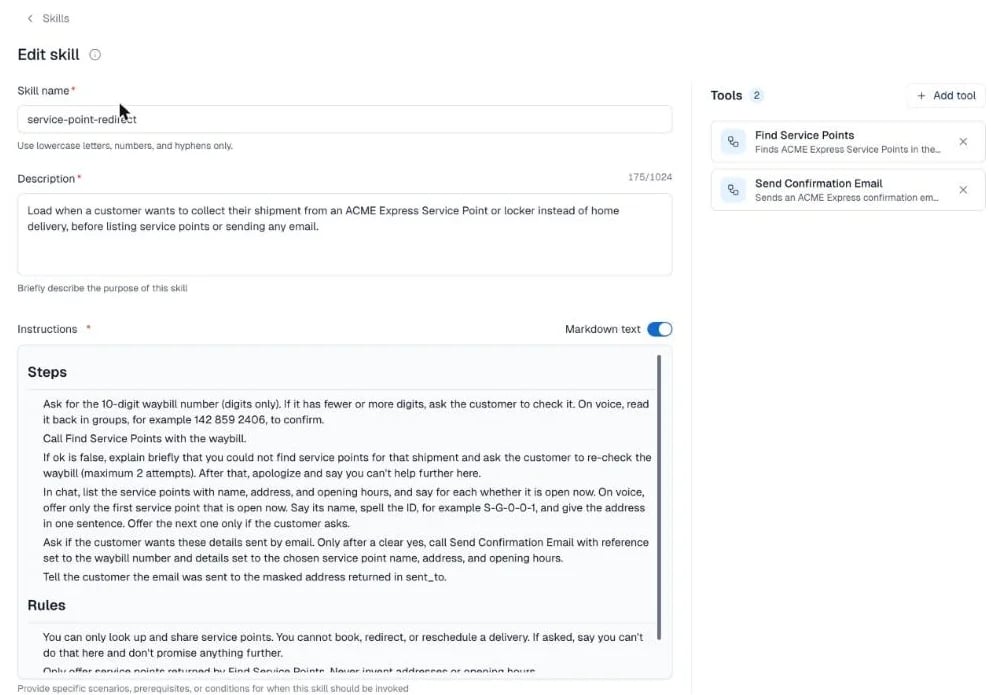
- Go to the Skills tab and click Add skill.
-
In the Skill name field, enter
service-point-redirect. Use only lowercase letters, numbers, and hyphens. -
In the Description field, enter the following text. Klara uses the description to decide when to load the skill.
-
In the Instructions field, enter the following text:
- In the Tools section, click Add tool, select Find Service Points and Send Confirmation Email, and click Attach selected.
- Click Save. A message confirms that the skill is saved.
8
Check the guardrails
Guardrails set the safety and privacy boundaries for the agent.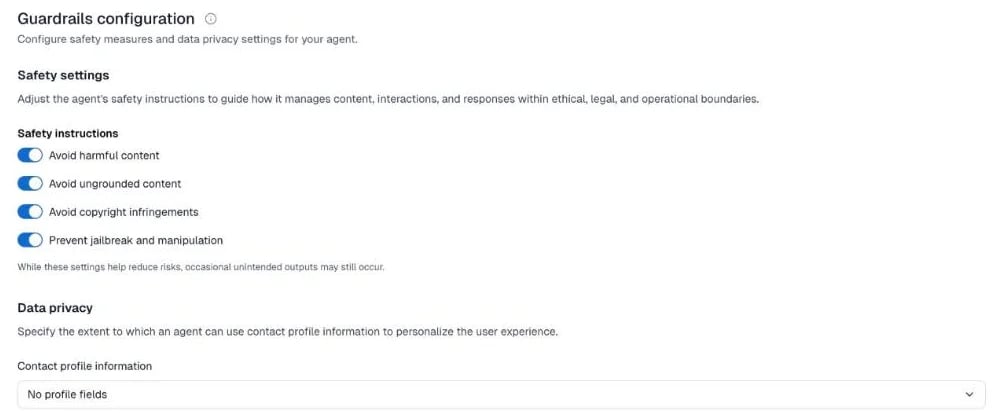
- Go to the Guardrails tab.
- Under Safety instructions, keep the following settings turned on:
- Avoid harmful content
- Avoid ungrounded content
- Avoid copyright infringements
- Prevent jailbreak and manipulation
- Under Data privacy, keep No profile fields for Contact profile information. Klara doesn’t need contact profile data, because in a real project the email tool looks up the address in your system. To personalize answers, select the profile fields that Klara can use.
9
Test Klara in the interaction panel
- Click the chat icon to open the Interaction Panel.
- At the top of the panel, select Klara from the list if it isn’t already selected, and select Chat. To see what Klara does in each turn, click the flask icon (Advanced mode) in the header of the Interaction Panel.
- Enter
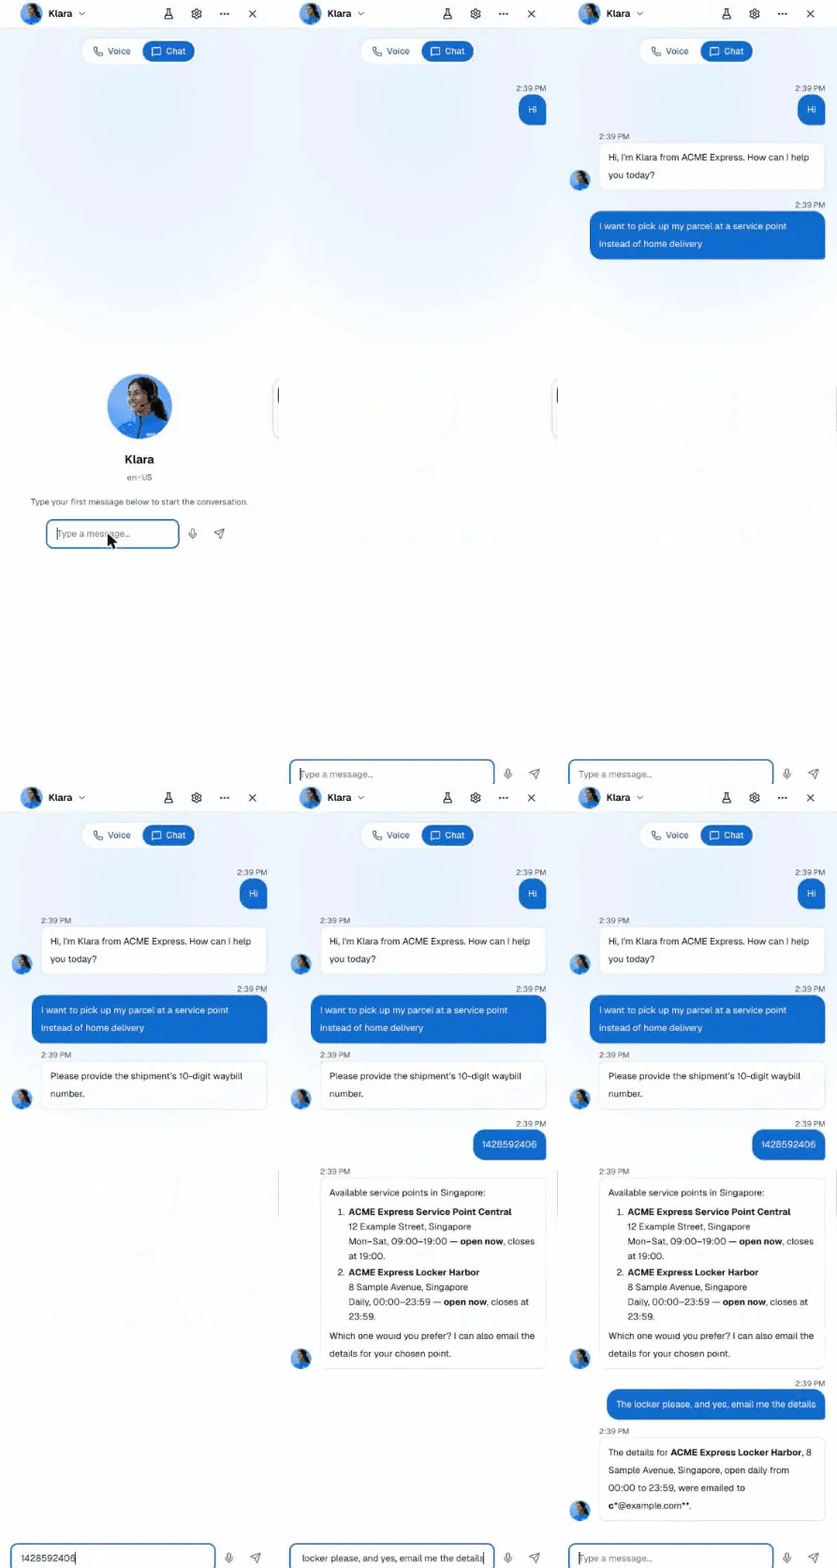
Hi. Klara greets you with the exact greeting from the instructions. - Enter
I want to pick up my parcel at a service point instead of home delivery. Klara loads the skill and asks for the 10-digit waybill number. - Enter
1428592406. Klara calls Find Service Points and lists the two sample service points with their opening status. - Enter
The locker please, and yes, email me the details. Klara calls Send Confirmation Email and tells you that the details were sent to the masked addressc***@example.com.
What’s next
You created a project and built Klara from scratch. You gave Klara a brand persona and instructions, a skill for collecting a shipment from a service point, two tools that run flows, and guardrails. You tested the whole conversation in the Interaction Panel. To continue, explore the following pages:- Connect a knowledge base to let Klara answer questions from your content.
- Add tools with functions to call external APIs and run custom code.
- Voice call to test Klara by voice.
- LLMs to use your own model.