Limitations
- You can add up to 100 Nodes in the Flow editor.
Exploring the Flow Editor
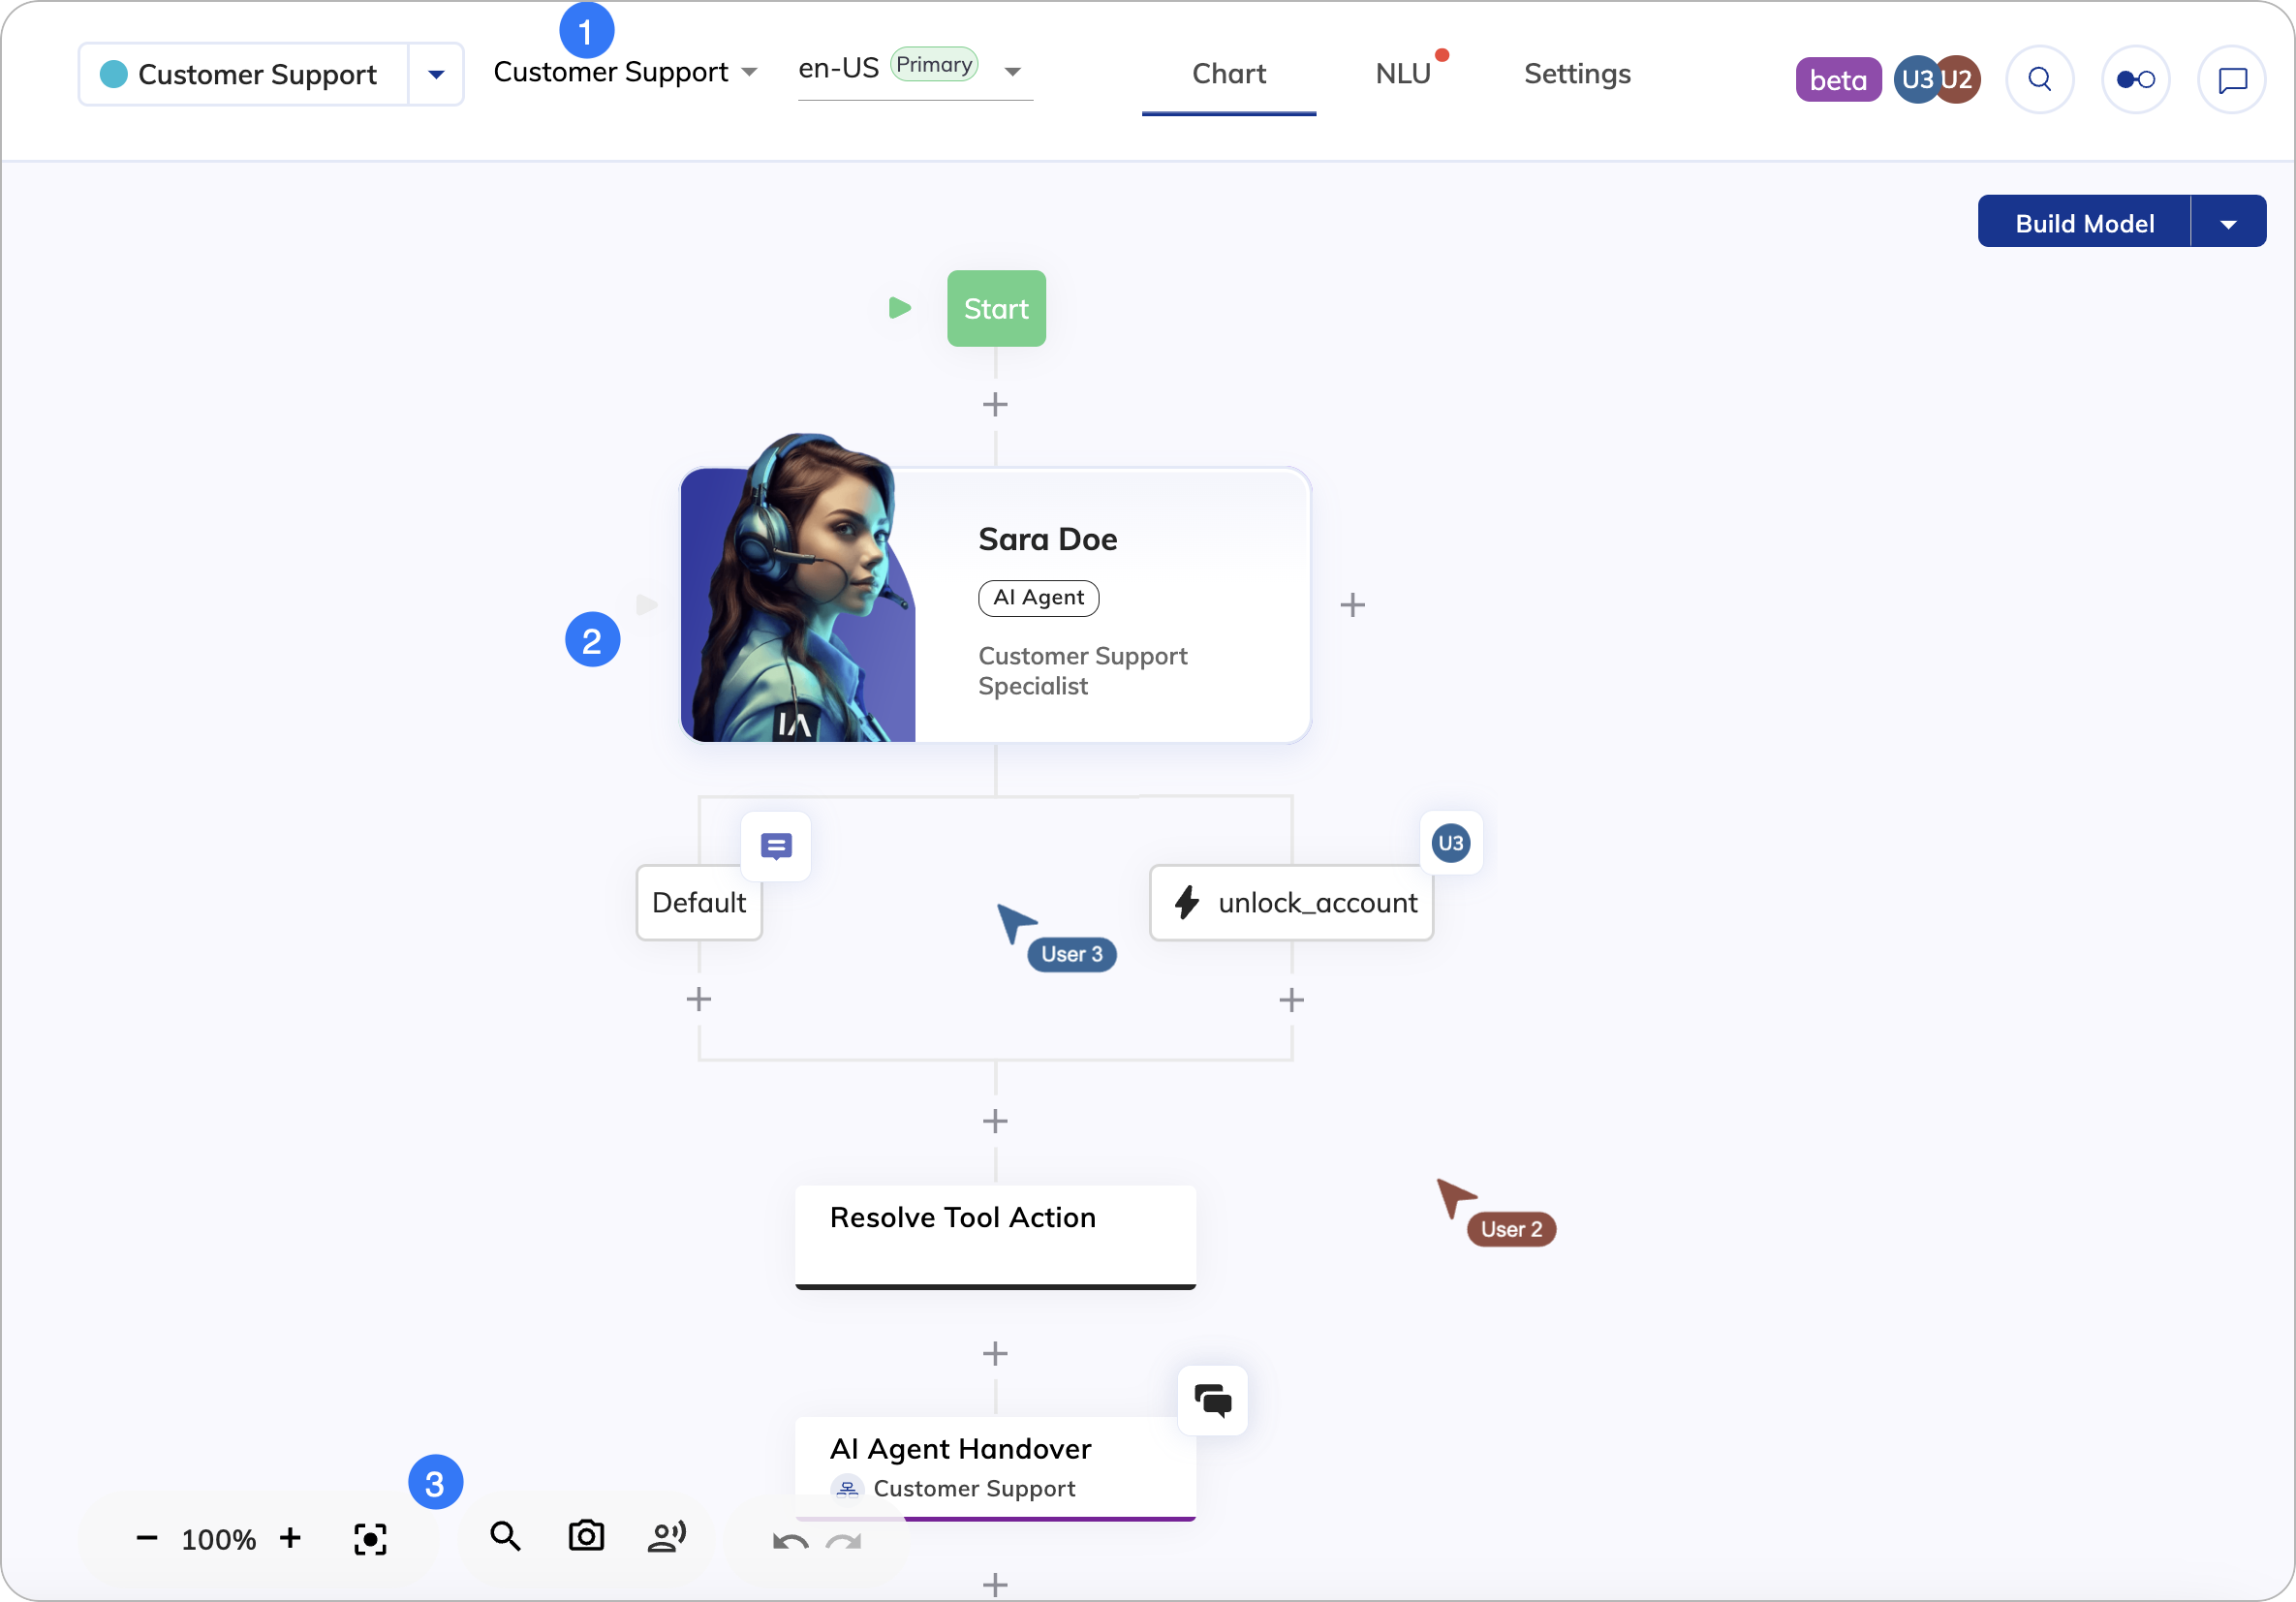
The following image shows an overview of the Flow editor:
1. Top Bar
1. Top Bar
Besides the controls from the Project Page top bar, the Flow editor includes the following elements from left to right:
| UI Element | Type | Description |
|---|---|---|
| Flow List | List | Search for Flows by name and switch between them. |
| Locale List | List | Switch between Locales. |
| Chart | Tab | Display the Flow chart. |
| NLU | Tab | Display the NLU settings, where you can configure Intents, States, Slot Fillers, as well as attach Flows and Lexicons. |
| Settings | Tab | Display the Flow Settings, Default Context, and Locale Settings. |
| Icon | Shows other users who have the current Flow open and active. |
2. Flow Chart
2. Flow Chart
| Button | Description |
|---|---|
| Click to add a new Node or Extension Node to the Flow. | |
| Click to see the comments in the Node. | |
| Indicates other users who are editing the same Flow. | |
| Indicates that other users are editing the Node to which the icon is attached. | |
| Click to open the Discussion menu on the Node and access Discussion Threads. |
The Flow editor supports drag and drop. To copy a Node, simply hold the Alt or Option while dragging the Node to another position.
3. Chart Controls
3. Chart Controls
| Control | Description |
|---|---|
| - and + | Zoom out (-) or in (+). |
| Centers the chart. | |
| Search for Nodes in the Flow. | |
| Take a screenshot of the entire Flow and save it in PNG format. In the top left corner of each screenshot, the time of its creation and the Cognigy logo are displayed. | |
| Test voice outputs without executing the entire Flow. | |
| Undo the last step by going backward in history. | |
| Redo the last steps by going forward in history. |