Localization
Cognigy.AI offers a robust Localization feature for easy customization and content reuse.
With the localization view, you can configure multiple locales. If one locale doesn't have content configured, the system automatically falls back to another locale that does.
While you can add additional locales for content localization later on, note that once the primary locale is selected, it cannot be modified.
You can localize your Flow in two ways:
- Standard Localization
- Localization with machine translation (provider credentials are required)
Standard Localization
Within standard localization, you manually localize Nodes and Intents without the use of machine translation.
Add a Locale to an Agent
Cognigy AI Agents use English as the default language. However, you can customize the language of your Flow to match your requirements when needed.
To create a locale, follow these steps:
- Open the Cognigy.AI interface.
- In the left-side menu, select a Project.
- In the left-side Project menu, select Manage > Localization.
- Click + Create new Locale.
- In the Name field, enter a unique name of the locale. This name will be displayed in the Flow.
- From the NLU Language list, select a language for your locale.
- From the Fallback Locale list, select a locale that will be used as default when a specific language is not available.
- Click Save & Build.
Localize a Flow
- Go to the existing Flow by selecting Build > Flows.
- In the upper-left corner of the Flow editor, select a locale that you recently created.
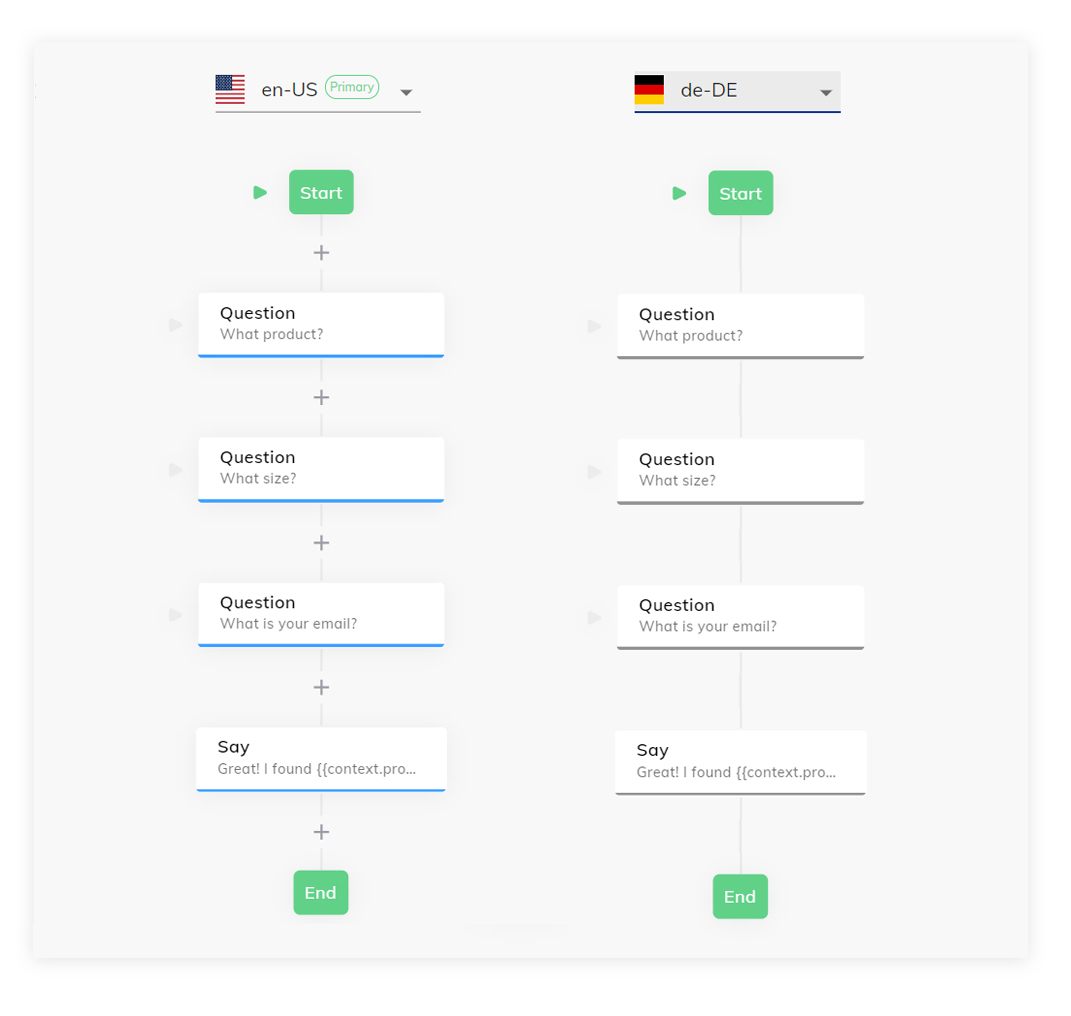
When switching localization, the Flow will change its appearance. Greyed-out Nodes indicate that they have not been localized yet.
Switching a Locale during a Conversation
You can change a locale of a Flow during a conversation by using the Switch Locale Node.

Now you need to localize each Node separately.
Add a Locale to a Node
To localize a Node manually, follow these steps:
- In the Flow editor, select a Node that you want to localize.
- If the Node is not localized yet, click Add Localization in the Node editor. If the Node was localized before, delete a previous localization by clicking
> Remove Localization.
- Select one of the following options:
- Add Empty Localization — create a new locale for the selected Node without any content. It's useful when you want to provide a new translation or content for a specific Node.
- Copy from — copy the content from an existing locale of the same Node or another source. It's useful when you want to reuse or duplicate content from a different locale.
- Fill in the corresponding fields with text that matches the selected locale.
- Click Save Node.
Add a Locale to an Intent
To localize an Intent, follow these steps:
- In the upper-right corner of the Flow editor, select NLU.
- On the Intents tab, select an Intent that you want to localize.
- On the Intent page, click Add Localization. If the Intent was localized before, delete a previous locale by clicking
> Remove Localization.
- Select one of the following options:
- Add Empty Localization — create a new locale for the selected Intent without any content. It's useful when you want to provide a new translation or content for a specific Intent.
- Copy from — copy the content from an existing locale of the same Intent or another source. It's useful when you want to reuse or duplicate content from a different locale.
- Click Build model.
- Click Save.
Add a Locale to Multiple Intents
To localize all Intents within your Flow, follow these steps:
- In the upper-right corner of the Flow editor, select NLU.
- On the Intents tab, on the right side of the + Create Intent button, click
> Add Localisations to all Intents.
- In the Add Localizations to all Intents window, select one of the following options:
- Create empty — create a new locale for the selected Intent without any content. It's useful when you want to provide a new translation or content for Intents.
- Copy from another locale — copy the content from an existing locale of the same Intent or another source. It's useful when you want to reuse or duplicate content from a different locale.
- (Optional) Activate the Overwrite already localized Intents setting to apply changes to all existing Intents within the current Flow locale.
- Click Build model.
- Click Save.
Copy the Local Reference ID
Reference IDs can be helpful if you want to edit Locales via API.
To copy the Reference ID of a Locale, do the following:
- Open the Cognigy.AI interface.
- In the left-side menu, select the Project you need.
- In the left-side menu of your Project, navigate to Manage > Localization.
- On the Localization page, click
on the right side next to the Locale you want to copy the reference ID.
- Select Copy Reference ID. The ID will be copied to the clipboard.