Questions and Answers about Live Agent
Live Agent
How to remove a user?
Removing a user (human agent) from Live Agent can be done from the Cognigy.AI Members page. The liveAgentAdmin/liveAgentAgent roles need to be removed, and this will prevent the human agent from logging into Live Agent. This can also be achieved by deleting the user from Cognigy.AI.
Head over to Cognigy.AI Access Control for more information.
How to create an Agent with multiple roles?
To create an Agent with multiple roles, read the Roles article.
What happens if an Inbox is deleted?
Inboxes created manually can be safely deleted, except those with the -default suffix. Deleting Inboxes with -default breaks the integration between Live Agent and Cognigy.AI. If this Inbox is accidentally deleted, see the solution in the question below.
What should I do if the Inbox is deleted?
You need to create a new Inbox. To do that, use the Adding another Inbox for your Project article.
Where can I check what the default Inbox is? Does it have a special account id?
The default Inbox has a pattern name XXXX-default, for example, 7119-default. You can rename it in Inbox Settings.
How to fix custom SSL certificate verification error?
That may happen because Cognigy.AI is running under a custom SSL certificate (Error can not validate certificate). And Live Agent is failing to perform the requests to it as SSL requests can not be verified.
Head over to Rest Client SSL Helm values for configuring it.
How to fix SMTP for no authentication provider?
For self-hosted installations, the SMTP configuration needs to be modified.
Head over to Helm SMTP values for more information.
How to create labels and assign them to conversations?
Once a label has been created, navigate to a conversation. There is a section called Conversation Labels on the right side, where labels can be added.
Head over to Labels for more information.
How to request a file from a conversation?
Head over to Attachments for more information.
How to add Agents to an Inbox?
Only users with Administrator roles can perform this action.
To add an Agent to an Inbox, follow these steps:
- In the left-side menu of the Live Agent interface, navigate to Settings, then select Inboxes.
- Locate the Inbox that you want to edit and click the Settings icon.
- On the Collaborators tab, select the Agent name from the Agents list.
- Apply changes by clicking Update. Head over to Inboxes for more information.
How to create a team and add members to it?
Navigate to Settings > Teams and click the Create new team button. In the second step, add the desired Agents. The added Agents can be updated later.
Head over to Teams for more information.
How to get the user access token (API Key)?
The user access token is displayed at the bottom of the Profile Settings.
How to view the account ID and the inbox ID?
This information can be obtained from the Live Agent URL.
A quick way is to select an Inbox on the dashboard screen. The URL will look like: https://<live-agent-domain>/app/accounts/1/inbox/4.
The URL follows the pattern accounts/{Account ID}/inbox/{Inbox ID}, where the account ID is 1 and inbox ID is 4.
Can a TTL be set for attachments contained in messages?
Yes, a TTL for attachments contained in messages per account can be defined under the Account Settings.
Is antivirus file upload scanning enabled for App and Trial environments?
The antivirus file upload scanning needs to be configured at the infrastructure level, and it is not enabled for the Trial and App instances at the moment. Head over to File Upload Antivirus Scan Helm Values for learning how to configure it.
How to navigate to Cognigy.AI from Live Agent?
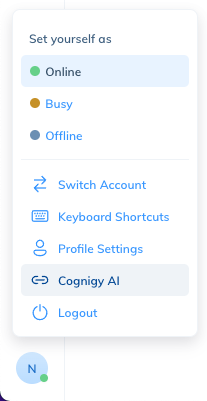
Under the profile menu, there is a link called Cognigy.AI that heads over to the Cognigy.AI. If it is not present, head over to URLs Helm values for configuring it.

Get a Google Maps API key
To see a location sent from WhatsApp with Google Maps, you need to get a Google Maps API key. Head over to the App to configure it.
Live Agent OData service
Why is the OData service not returning all the information from the database?
The OData service returns data belonging to your account.
Head over to OData Endpoint for more information.
Why is the OData endpoint throwing an unauthorized error while querying?
If you encounter an unauthorized error, ensure that the API access token belongs to a user with the Administrator role for the account being used in the query.
How to retrieve all content from a particular collection?
You can retrieve all content from a particular collection, for example, Conversation, Message.
The following filtering query can be performed:
For example, http://{{ host }}:{{ port }}/v1.0/odata/Conversation?$filter=created_at le '2126-11-23T00:00:00'.
It will return all the fields for the Conversation model created before 23/11/2126.
Head over to OData Endpoint for more information.
How to filter OData with specific fields?
To filter OData results by specific fields, you can use the $select and $filter query parameters.
For example, http://{{ host }}:{{ port }}/v1.0/odata/Conversation?$select=id,account_id&$filter=created_at le '2026-11-23T00:00:00'.
In this example, the request is retrieving the id and account_id fields from the Conversation model, filtered by the created_at field being less than or equal to 2026-11-23T00:00:00.
For more detailed information, refer to the OData Endpoint article.