Flow Editor
![]()
The Flow Editor is a user interface (UI) where you can see a graphic representation of a Flow, the Flow Chart, and design AI Agents' conversations. In the Flow editor, the Flow consists of Nodes that represent various actions or decision points. The Nodes are linked to one another by lines that indicate the conversation's path, from the Start Node to the End Node.
The Flow editor allows for Collaborative Editing. This means that multiple users can edit the same Flow at the same time.
A green arrow next to a Node indicates the Flow Entrypoint. The Entrypoint is where the AI Agent expects a user entry. The Flow editor highlights the path of the conversation in green. The green path allows you to understand the Flow execution path at each step, depending on the input in the Interaction Panel.
Limitations
- You can add up to 100 Nodes in the Flow editor.
Exploring the Flow Editor
The following image shows an overview of the Flow editor:
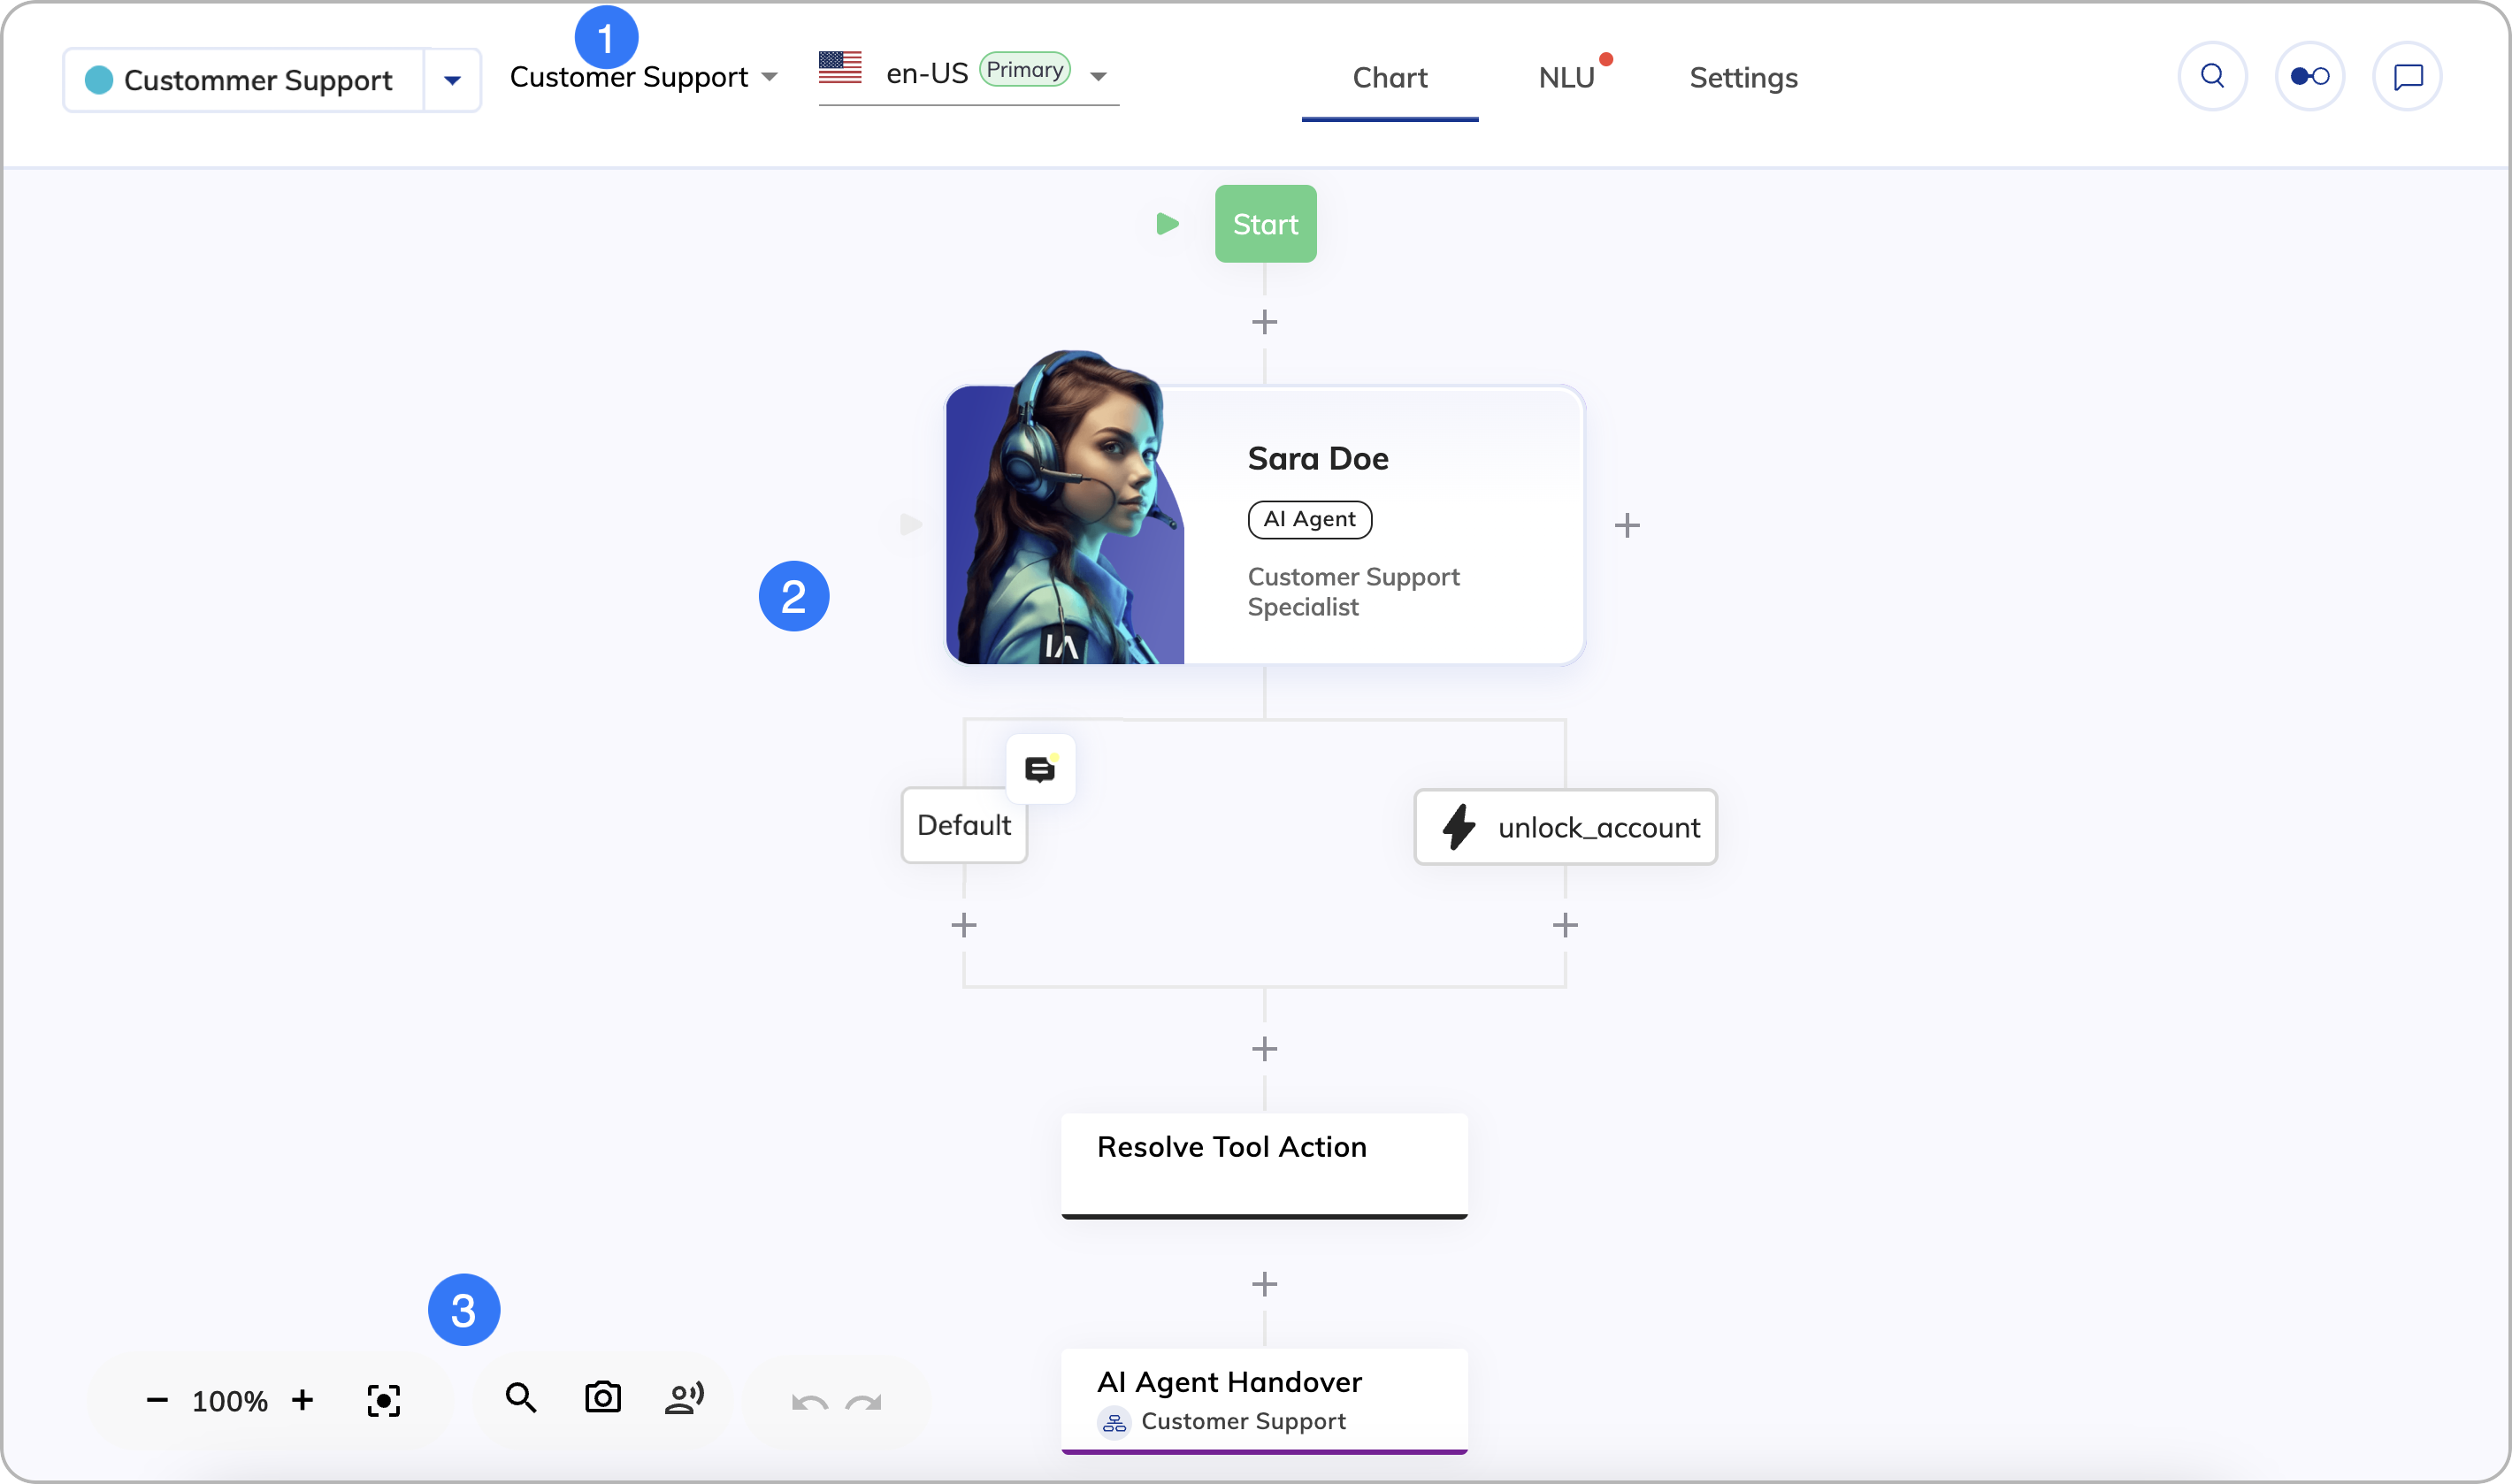
1. Top Bar
Besides the controls from the Project Page top bar, the Flow editor includes the following elements from left to right:
| UI Element | Type | Description |
|---|---|---|
| Flow List | List | Search for Flows by name and switch between them. |
| Locale List | List | Switch between Locales. |
| Chart | Tab | Display the Flow chart. |
| NLU | Tab | Display the NLU settings, where you can configure Intents, States, Slot Fillers, as well as attach Flows and Lexicons. |
| Settings | Tab | Display the Flow Settings, Default Context, and Locale Settings. |
| Icon | Shows other users who have the current Flow open and active. |
2. Flow Chart
| Button | Description |
|---|---|
| Click to add a new Node or Extension to the Flow. | |
| Click to see the comments in the Node. | |
| Indicates other users who are editing the same Flow. | |
| Indicates that other users are editing the Node to which the icon is attached. | |
| Click to open the Discussion menu on the Node and access Discussion Threads. |
Drag and Drop
The Flow editor supports drag and drop. To copy a Node, simply hold the Alt or Option while dragging the Node to another position.
3. Chart Controls
| Control | Description |
|---|---|
| - and + | Zoom out (-) or in (+). |
| Centers the chart. | |
| Search for Nodes in the Flow. | |
| Take a screenshot of the entire Flow and save it in PNG format. In the top left corner of each screenshot, the time of its creation and the Cognigy logo are displayed. | |
| Test voice outputs without executing the entire Flow. | |
| Undo the last step by going backward in history. | |
| Redo the last steps by going forward in history. |